nav2

Showing posts with label pipeline. Show all posts

Saturday, March 16, 2013

Shape keys vs Blendshapes

This semester my optional module is facial modelling and animation. This is yet another animation module in Bradford University that makes the student create an entire pipeline before animating anything. So there you see why there is so much modelling and rigging stuff on this blog and so little actual animation. None of the modules really allow me to focus only on animation and it usually happens in the last weeks of the assignments :)
With that grudge aside, I decided that such a module would be a good opportunity to refresh my facial rigging skills before getting on with that part of Soda Trip's production. Gotta make some lemonade.


So why pick blender to make the blendshapes and go through the hassle of exporting to maya again?
The character was modelled in blender, so it made sense to continue using the nice modelling tools.


Well, they are called shape keys in blender. Instead of duplicating a mesh, deforming it and applying that as a blendshape, blender stores the keyable deformations you make on a single mesh inside a shape key data block of that mesh - it stores the new coordinates of vertices you moved while being in the specified shape key mode.

Shape keys in Blender vs Blendshapes in Maya:
Blender allows me to change the topology after I have already made   multiple shape keys on the mesh . It's like changing topology in maya after having made multiple blendshapes.
Whats nice about it is that I can use this new topology to shape my character on some of the already created shape keys.

Maya does not allow you to alter the topology of a blend shape object- if you add an edgeloop, it will not affect the target object or might break the blendshape (you cannot reaply it any more).
You can change topology of the target (base) object, but that new topology is not being transfered to all the blendshapes you have - again, you can't use it to deform.
So you are in a strange sort of a situation when you have to somehow relink blendshapes or redo them. Thats gonna suck pretty bad if you have about 20 of them already :D 


In this case the upper eyelid becomes a classic example. After the character closes it, the mesh needs an extra edgeloop in order to curve it along the eyeball slightly.
In maya, you have to add that edgeloop in advance. You have to guess how many edgeloops- some people add much more than one - you can add a few too many.
Here I can completely close the eyelid with a new shape key and then add as much geometry as I need to keep it from clipping with the eyeball.
It also lets me alter the shape key geometry when its not at its full value- in this case when the lid is half closed(.67), I can move the bottom edges forward.
To do that in maya you need to constantly look at the two meshes, set up an elaborate workspace with two cameras- one looking at your base mesh, one looking at the blendshape-work on one while looking at the other -  it's just a pain.

Sculpting the blendshapes:
To get a good view over how the geometry deforms on my shape keys, I toggled on the excellent new matcap view mode and toggled on my wireframe from time to time:


Ton Roosendaal (Blender's founder) asked the community for matcaps for the very first version in trunk to support that feature as a preset in the viewport.
I made him two grey matcaps that might not look like much, but are actually pretty good at showing clearly how the geometry deforms and showing subtleties in a sort of a neutral way.
Ton included them in the official 2.66 release(mc8 and mc9). So now I can proudly say that I made a little contribution to Blender and to it's very big artist community! :D

Transfering blendshapes from blender to maya:
Just as with the recent posts , in this case I am transferring geometry from blender to maya and referencing it in maya. Only this time, I also need to export all the shape keys that I have created for my character's face and hook them up in maya.

When you export an fbx from blender that contains shape keys, maya gets all of those shape keys as sepparate meshes that have no material on them.They are also already applied as blendshapes to the main one and hidden.


Blender's fbx exporter impressed me this time. That is pretty neat! Only feature thats missing for me now is the option to zero out transformation values on export. I dont like having a dirty channelbox.

So It might look like I am pimping blender out a lot lately. That is hopefully not making me look too biased. The truth is that I need these features to do my work faster and blender is giving them to me. It's effectively competing with Maya, undermining aspects of it's pipeline. But Blender is not perfect. And in future posts I might write about it's weaknesses.

Friday, March 1, 2013

Blender-->maya pipeline. Setting a reference network


Getting the stuff from blender to maya had its quirks.
I'm gonna share this mini tutorial with the hope it will save somebody else the frustration that I had to go through.

If  you pose your assets and export them together to an fbx file, this is what you are going to get in maya.

To get around the mesed up translations and rotations, I had to apply all object's coordinates. This in blender terms means that their local origin is going to move to the world origin.
That unfortunately stacks them on top of each other
Each is on its own sepparate layer in blender, so its easy to toggle that mess off and work on stuff individually.

Another thing I did was making sure my scale is the same in both packages. To do this I set up the metric system in both to be consistent. One grid square=1 meter (scale =.01 in blender). I set the same values in maya in advance.

Then I export it with the following settings. 

modifiers are being applied on export, so I made sure that all subdiv modifiers in the scene are removed. 

Maya's default world orientation is y=up, -z=forward. Whats nice though is that it kept the parent-child relationships between objects, so It kept my null controllers and turned them into locators. This makes it easy to move objects in the scene that have multiple meshes.


Referencing:

So why is referencing useful? It allows you to make changes to your model and rig after you have skinned it. It's also a neat way of isolating data blocks in separate files - making it more manageable. It means being able to  swap different versions of geometry and your rig with a few clicks. - load a low poly proxy (cubes), continue to improve a rig after you have started doing animation on it (in my case its adding facial controls after finishing body animation). It means being able to track down issues easier. It does add to the loading time though.


One thing that I found with my last animation project is that while you can edit referenced files in Maya to a certain extend, every edit you make to them of course stays in the maya scene file, its not done to the (in this case FBX) reference. 

It's a good rule of thumb to keep edits to a minimum, as it contaminates the scene and increases the chance of problems. So I never do stuff like editing the geometry of an object that is referenced in the scene. The reference edits list window in maya keeps track of everything you've done to the reference. Sometimes if a scene is broken (crashes on load), its a good idea to load it without its references loaded, find the problematic ones and clean up their list a bit.

In this case, maya is storing only the new locations of the controller objects and unfortunatelly the frozen transformations command that I did before moving them into place.
Blender rotates all the stuff accordingly and adds rotational offset to the values in the fbx. I had to zero them out in maya.

Referenced objects paths:
If you use the file manager to load and reference a file, by default maya will use the full path of the file. As a result if you move your projects folder to a new place, new computer or drive- all of your reference links will become invalid and you will have to manually relink them. It doesnt sound like a big deal, but if you have a big and complex network that can become an issue on an operating system such as windows, where you cant create symbolic links. So the computers at university have maya on windows, while I use maya on linux at home. Maya on windows has poorer performance and tends to crash more often. Submitting my source files to uni computers meant that all the reference links would get broken and likely my tutors will be unable to open them without having to spend at least half an hour relinking the files. As an extra annoyance both maya 2013 on windows and linux have a bug where when it prompts you for the new path and you give it , it doesnt apply it and also makes you wait for ages to search the files and fail.


So what was the solution to that one? It's pretty tough to find with google and after searching I found that other people have had the issue but their solution was sort of wrong and wasnt really a solution.
At the same time I was pretty sure that maya has the ability to use local paths for anything that is inside the project folder. However to make all the paths local I had to change them manually, without using the file browser. So after renaming each to use local links, now all my references just work out of the box, wherever you move the project folder.But it's my suspicion that whoever opens it after me has to make sure they set the project folder location.

MAYA BUG: Unfortunately Maya 2013 (and older?) has a bug where it does allow you to use fbx files as references, but does NOT allow you to have local path linking for fbx files (only full paths- even tried with fbx files created by Maya). That forced me to import my blender fbx files to maya, save them as maya binary files and then replace the fbx references that I have with mb ones. It means that every time I make changes to my models in blender, Instead of updating automagically where they are referenced, I will have to manually import them in maya and save them as mb/ma files. :(

Autodesk, please fix this bug!!
Do let me know if you know a better solution. :)

Wednesday, February 13, 2013

Soda trip - modelling background assets

I did this stuff at the end of last year and just now getting around putting the notes in a sensible way. If you're not interested in modelling  this post is going to bore you :)

There are two types of geometry in an animated film- one that is to be skinned - with good organic topology edgeflow to serve the deformations and one that is to be used as a background asset. That needs to be:
  • as Low poly as possible (for proxy use during animation stage)
  • edgeloops at the right places- to keep those hard edges when subdiv modifier is applied during rendering time
  • edgeflow doesnt create any shading problems
  • Use the whole toolbox and modifiers wisely to save time- pick the right tool for the right job, instead of 1 tool for every job (I'm looking at you extrude and edgeloop insert ;))
So with these goals in mind I set off to model the things in the long list, so each asset is

Easy to edit:
  • non destructive editing (modifiers,curves,etc)
  • Reuse geometry and its modifier stack where ever possible (no need to build modifier stack from scratch for everything, just separate new objects from existing ones)
  • work on halves, Instance and dublicated geometry where possible
Here is a list of the modelling tools that I put to practice in blender:

Lofting: using surf curves+mirror modifier to create a nurbs patch. I use the mirror modifier for reference, then just dublicate the curve and flip it (s,y,-1).


also used nurbs patches for the typewriter body. This allowed me to tweak the proportions easily before going into any detail.

Using CV curves and nurbs is an excellent way of creating precise shapes that have some curvature. The method is quite simple, yet still  flexible in blender!


In order to create the keyboard, I made 12x4 rows of vertices for each button, then made a single button that was instanced on the place of the verts automagically. This allowed me to scale the button and change its design on the spot, updating all of its instances.
I dublicated my button map object and used it to create the button trunks by extruding the verts and then applying a skin modifier for the created edges.

similar technique to the coat hanger:
its using a 3d curve that is set to bevel and that object is being instanced on the vertices of a circle object that goes around the hanger's pole. 4 verts= 4 legs.

Something common with all the assets is that each is made with the minimal amount of geometry to edit. I try to leave as much as possible to the mirror modifier- sometimes using 2 or even more mirror modifiers, array modifiers,instancing and so on to procedurally generate the parts of a mesh that repeat. It's procedural, but it saves time. These sort of tools are present in maya as well, but they are much worse and quite unreliable some times.
Here one edgering circle is being dublicated by the array modifier, mirrored by the mirror, solidified and the subdivided.- all non destructively, so to change all the rings, I need to edit only the two edge loops that form one 7 faced edge ring.


I used a bezier curve+ text object for the fridge logo- so it fits the shape of the fridge door and also has this corky bend to follow the curves of the curcle beneath it. I made sure the curves handles are precise by copy and pasting their corresponding coordinates from the start node handles of the curve (left side) to the end node handles (on the right side).
The text object is editable, so I can change fridgeomatic to something else if I want, swap the font, resize, etc etc.
 You can see in the wire that the fridge door also has some jars, ketchup and other stuff modelled. Everything is using a subdiv modifier, so it has a low poly proxy stored.

Other modifiers I used on assets that are not in the screenshots: Boolean, skin modifier, etc etc..


Wednesday, December 26, 2012

Reusing 3d animation and rigs for games - research report for university

One of the university modules in this semester had for an (optional) assignment the research of reusing character rigs and animation to be imported to a game's engine.

I was given a deadline to write a greenlight pitch, a research paper (almost 30 pages!) and then create a technical demo video.

 It's pretty much do it yourself sort of a thing set by university(just as many other things).
In this case before even delving into reusing animation clips, I decided that it's more important to find out what exactly are the best practices in character rigging and animation for game engines - where the data has to be created in a specific way that will make it friendly to use by the programmers and the engine.

In the research paper I used for sources the excellent presentations on animation in Uncharted 2 by naughty dog, among  other things.It was a bit rushed so It got me 64.4% .

For the video, I used kdenlive to put together a quick overview of the findings of experimenting with some of the tools in Maya:

http://youtu.be/YOuWO8My84c

That got me 85 % .

The paper and the video focus on the work that is done in the animation package rather than the game engine. I have in the past done character modelling, rigging and animation for Unity 3d. That first experience was a bit of a trial and error - the animation data needed to fit with how the character actor is scripted.It's something that I will keep fo a future post, until there is time to put together a demo of that game.


Wednesday, February 2, 2011

some models for the mocap and progress on pbank

The animation of piggy bank has gotten a bit longer than expected. The plan was 2 minutes and now its getting a little longer than 4. Truth be told, I hardly work on it lately because of all the other assignments and the part time jobs (I have two of them would you believe it). My plan is to render it when its absolutely perfect. If this was my job and I was getting my bills paid while working on it every day, I am pretty sure it would have been ready ages ago! It's the polishing that eats most of the time- getting those curves and the timing to work well. I am still relatively new to this 3d animation business, but that doesnt stop me from having high standards and be critical with the work.

You see, its not perfect and when its not perfect, I just dont render and post it. :)

It will be probably ready for the festivals this year, so anyone interested to send/suggest invite for events, please feel free to drop an email with the info.I do appreciate that sort of attention :)

The Mocap assignment
So this semester I signed up for one extra module that I believe will be a good addition to my portfolio, especially if I apply for work as an animator for video games. Motion Capture has been around for quite a while now in industry and we've all seen plenty of good ,bad and ugly examples of its use. My personal opinion about it is more or less the same as any other I've heard from classic animators. The truth is that the moCap data is often awkward when applied to the body of a character. I believe that is due to a number of reasons- one being the movement of the actor (often not an actor) not fitting the design of the character.The timing of the movement is too realistic and snappy, it has some random rubbish that needs to be cleaned up (like random gestures). It will never be able to replace good old fashioned animation, but it certainly will continue to be part of what industry needs, especially for sports games. What I hate about the majority of Mocap is just it's mediocrity and genericness.Generic people doing generic things- fighting, running with guns,doing some sports... That is why my goal with this module will be to give character to my characters, make them unique!

Speaking of the that, let me start by introducing them :

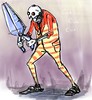
yet another character that I designed and modelled- I call him scissorman
Scissorman aka The Sepia Baron
I created this character as a tribute to classic horror game "Clock Tower".. You might notice my strange obsession with stripes is present here as well. He is kind of like a limping clown. The scissors are there to cut off the next character's head off.

rose creature concept
Plant man aka "The scarlet torn" is a character that I created a year ago. The idea for him came from my obsession with venecian masks+ Edgar Alan Poe's short story
I studied Philology back at the university of my country years ago, so that helped me develop some literary taste and some understanding of ancient to 19th century culture. Ok, enough bragging from me xD moving on

So as you imagine, I will have to model these characters. Well guess what, I already did. I want to talk a bit about the process and some tricks I developed to speed it up. Both characters took two days to model and I spent about 10 hours in total to do them both.
Starting with Z-brush, I first sculpted a high res plantman. Then retopo-ed and UV-ed it in 3d Coat. Getting him back in maya, I started adding the detail that will be on separate meshes (to ease skinning).

The hair, roses, thorns, leaves and so on was all made with CV curves in maya.

Moving on to scissorman,I did him from zspheres and there was no need to retopology, due the nature of his design- Just a bit of extra work in Maya to get the right amount of geometry where needed. I got to the conclusion that the bit that takes me the most time during modeling and is usually the most boring part is getting the topology of the hands right. So, I decided to make a set of hands to reuse in my pipeline, by just attaching them to the model. I made the first hand purely in Maya. It is as low poly as possible. Then I made 3 variations of it, each having a different number of vertices at the connection point- the wrist.


So I took one of them and just stitched it to scissorman and made some minor modifications in the shape. The topology is the best of what can be done on a non realistic character. I dont want to sound a bit arrogant by saying this and it usually happens when I am being critical, but I've seen ALOT of bad topology on hands on the internet. I know mine is no masterpiece too, but some of them real bad ones are being sold for a fortune at cg store websites. :D It's mind blowing. Have they no shame?


Moving on to UV mapping, I realized that I dont really need to use different space of one uv shell, if its going to be exactly the same as it's symmetrical counterpart. So when I uv-ed scissorman, I made sure that his left and right hands,arms, feet, and so on have the same uv shells. So after unwrapping them in Blender (of course- because its much much much better than maya at this) what I did was flip over and lay the left side uv shells over the right side ones. So the left and right hand of the character would occupy exactly the same place in UV space.

The one disadvantage of this is the obvious inability to be asymetrical with the texture.
The advantages are too good to pass on though- Not only do I have to paint only one side of the model at certain parts, but I get to give them all more UV space, more pixels for the texture!


The mocap data is going to be put into short loop sequences that can be used for a game. So the big picture is , if this works out nicely, we will be able to assemble a team of other students from gamings course and import this stuff in a mini UDK or other engine project. I am not going to go into detail about the game at this point, as it is not clear if it all will work out..

Sunday, January 31, 2010

Flash animation Pipeline

It's second semester now and I have a special assignment as part of one of my modules- Create a 30 second animation in flash... Sounds simple, right? Well,no! 30 seconds is not enough to create something meaningful for me. I had a lot of trouble coming up with a story that will last only 30 seconds and will put a smile to someone's face.

So the biggest issue was really fitting it in 30 seconds.

I felt like I have an advantage over the other students (well, some of them) .. I already have worked with flash on a professional level. I have worked on an animation show, called scoyo and another one- bio. So I know how the pipeline works- the steps in the production of animation. Nobody at uni told us (yet?) how does the pipeline work with 2d animation. Nobody told us how to do it, the storyboard, how to organise the fla files and take full advantage of the software. My guess is that they will in the following weeks. But I already have it all in my head. So, in case some fellow students from my course read this, I hope it will help them.

This is my production pipeline for 2d animation. Something that I learned from work experience.


Flash animation Pipeline


By Todor Imreorov


1.0 Storyboard


2.0 Character sheets

Make character variation sketches ---> make a character sheet


3.0 Animation in Flash
3.1. Set flash file
3.2. Import storyboard *.mov file and set the global timeline

3.3 Set the scene and create the character libraries


example of symbols/sub symbols hyerarchy