nav2

Showing posts with label 3d. Show all posts

Sunday, August 28, 2016

Job applications - happy villager

I had a call from an agency a couple of months ago. They forwarded my portfolio to a studio in London. The studio was looking for an animator/rigger with experience in Unity3d and mobile games. My previous experience was close to what they were looking for and that got me to the interview stage. They interviewed me via Skype and explained that the final stage would be a test for which I have 4 hours to complete and send.
The test was on the following week. When I got the project file the clock started ticking. I didn't know what to expect prior to getting it. What I got was just body parts in black and white , and a reference image (on the right). The goal was to rig the character and animate a happy emotion that is up to 4 seconds long.
Rigging the character took about an hour. I arranged some elements into their own subfolders. The hierarchy of elements was key to getting the animation polished quicker. For example I put all face controls under a facedir node - that would allow me to turn her head with less keyframes to manage.
The minimalist character design was a good thing in this case - even with the imposed limitations -such as for example the lack of joints in the legs. I worked with what I had.

All and all they never did give me a call. Instead the agency told me that I have passed their test and they really liked my work. However the CEO has decided to hire somebody that they already know from previous projects instead.

Normally I wouldn't share work done for others, but given how I did not get paid in this case, how they didn't give me personal feedback and also that there was no NDA signed, I feel absolutely free to share this here :)

The animation has a drop in frames, because it is captured from Unity with capture software. When running, it is as smooth as butter 60fps. Thus why all I could get out of the whole experience is now the gif file you see above and the unity project.

If you are looking for an animator with rigging experience - who can do the rigging and the entire animation in Unity alone - I can send you this test file to review it yourself.


Wednesday, May 18, 2016

Texturing PBR materials in 3D Coat and exporting to Unreal 4

3D coat generated an ambient occlusion and a curvature map for each object I painted in it - that way it knew how to paint in crevices that are stored in the imported normal map.
It was excellent in this regard as I found out that it can handle memory quite well when compared to Substance Painter. In 3d Coat I was able to get over 40+ layers on 2x2048 maps of 3 paint objects - with all channels + normal map. In substance painter - it just crashed on the second or third layer I made (preview texture set to a miserable 512).Even though my laptop is 7 years old - 3d coat handled this one quite gracefully.

For the skin I used one of the leather pbr shaders that came with 3dc and heavily altered it to make it look more like human skin.
Of course it is really difficult to fake SSS in real time. Unreal engine - which is the target engine for this character does have a SSS shader, but since the character will not get any closeups and not much of the skin is really revealed- I decided to be cheap again and stick with one material for the entire character. Before texturing the body I made an import test of the head/spray mask texture.

I set the texture maps in unreal in a way where the alpha channel of the diffuse is used to store the roughness map pass. I also wanted to use tha alpha channel of the normal map to store the metalic pass, but I found out that Unreal 4.10 does not allow using the alpha channel of a normal map texture if the file is a png. A few forums noted that it will work if I use targa instead - but targa is a huge file size and I thought i wont be saving a lot that way.


I imported my character with the unreal rig applied to it.
Here is the model - you should be able to preview it in your browser:


For the spray cans in the game I used an rgb map to split it into three areas - cap, sticker and can . The alpha channel of the sticker controls the sticker's mask in this case. That way the programmer on the project - Steve Stavrev can control the color of each instance of the spray and even change it dynamically during run time to create some interesting effect. 
His pose and animation is not my work - it is using one of the unreal project examples. Since my binding pose and the source binding pose are slightly different, the actual animation is a bit screwed up on the target. Unreal 4 supposedly has nice tools to adjust binding poses and when this issue is at hand, but I discovered that as I am writing this (4.10.4) there has been a bug for over an entire year that nobody from epic fixed that stops the users from doing that. I had to blindly set up the bones in blender, but the fingers are still screwed.
The best thing to do here for my portfolio is to actually make the animations myself, but unfortunately the freelance nature of the project dictates that we make do with this.

Sunday, May 15, 2016

Some notes on baking Normal maps again

Flipping UV islands is a common way of getting more pixels to cram in detail. What you do is for each symmetrical part of your model, you take the left side and flip it over the right side.

 That doesnt mean that the entire left side should be the same as the right - if you do that your model will of course be a bit bland. So plan in advance which parts you want to have symmetric and which not. You should plan it right from when you start making your high poly model.
In my case, I sculpted the nude in Zbrush completely from scratch, but used marvelous designer to create his outfit:

Making the hoodie was a  gotcha moment.I had to first stitch it in neutral pose over his head and run the simulation to get it to wrap around it naturally, then I puled it down to fall over his jacket during another cloth simulation. He looked good with a hoodie on, but the final design was planned  with a hat on instead.
Marvelous provided some really nice realistic cloth simulation which resulted in a good starting point for wrinkles and detail. Bringing the clothing back to Zbrush - I added detail to it - more wrinkles and a zipper here and there, the shoes and shoe laces. The hat, the hands and the respirator mask are all made in blender - where modelling them made much more sense. For the mask I used modifiers heavily. Wireframe modifier was perfect  for the cage.

Naturally the generated cloth mesh had no symmetry. So then when I started doing retopology in blender - the plan started forming more. For the outfit I will keep the middle part asymmetric, but will reuse the texture space of the sleeves. Same goes for the pants. His face will be completely unwrapped, but I will reuse uv texture space of the neck, the the cap shade and the shoes.


So I did the model accordingly in two stages- first retopo the asymmetric bits, then do the ones that reuse texture space - with a mirror modifier. I had to cut the hi poly model import from zbrush and marvelous designer into body parts and make the planned ones symmetrized for the high poly mesh - where there was no symmetry for the clothing. Thankfully blender has wonderful sculpting and modelling tools that make that part a walk in the park.

 When baking a normal for a target model with flipped islands that overlap their counterparts, you are most probably going to get seams.
If you want to avoid it, but still be able to reuse texture space via flipped uv islands, it is important to do this: Select all islands that overlap other islands, and move them in X + texture.width.


As a side note you need to consider that this UV technique does not work if you need to bake a lightmap on the model - which is usually the case for static background objects.

For the mask normal baking, I arranged the uv islands in a way that it will bake the bars perfectly horizontally and vertically. It is generally a good practice to arrange your islands in a way where you will get less diagonal lines on the bake - try to avoid diagonal straight lines as a whole. Horizontal and Vertical lines have  no anti-aliasing you see - so geometric detail such as this looks much crisper on lower texture sizes. If you look at model rips from old video games - you will see that they utilized this approach quite successfully to get some good looking textures as small as 256 or even less. I was also being cheap again with reusing UV space  with a vertical mirror. Whenever you can, and especially for detailed parts with repeating elements - try to reuse texture space!

In most cases, you will still need to clean up the bake result.
The normal cleanup was done in Krita, as 3D-Coat does not allow cleaning up external normal maps. Their import layer is locked and limited to very few operations.
 It was however quite good at further detailing them during texturing with your PBR materials. Next post will be about that =)

Tuesday, February 16, 2016

Spiter Render Kit - for Blender 3d

Here is something that I made for myself - primarily for game jams. I used it on a bunch of personal projects too. After a while I decided to pick it up, give it some polish and share it with the rest of the world.

What is Sprite Render Kit?

Sprite Render Kit is a sprite rendering system for Blender - specifically designed for rendering animated and static sprites for 2d games.
Its benefits become most obvious when you need to create a sprite with 4 or 8 directions of animation. It's main goal is to save you time!

In one click you render an animated character from 4 different angles and the files are properly named!

The Kit contains:


- A Scene Setup - Created to allow Blender to render an animated model from 4 different angles simultaneously.
- It is made out of one main scene (where you set your settings) and 3 more scenes for the remaining camera angles!
- The work Layout is created in a way that allows the user to conveniently view the model from all the 4 target rendering angles on one screen.


- An extensive Python Script, created specifically to allow the user to sync all scenes to the main one. Set it up in the main scene, the rest get synced to it in just a single click:
- It syncs all of your Render settings (BI and cycles)
- It syncs all of your Freestyle line sets from the main scene to the other scenes in the file (useful for sprite sheets with lineart)

- A Camera Rig, capable of simultaneously controlling all 4 cameras:
- Designed for Rendering an animated model from 4 different directions
- In ortographic or perspective mode (Ortographic is recommended)
- Tweak the center and angle of rendering with easy to use controlers
- Control zoom level
- Control render angle (45 degrees = isometric)
- Control the height angle of all cameras or on a per camera basis
- Control an offset on the left and right cameras - easier to center the model

- A node output setup - capable of rendering all sprites to a dedicated directory -set with proper naming conventions

Great! Now, how do I use it?

Here is a How To video:
The process is fairly straightforward!
  1. Open the blend file included in the zip
  2. Go to the first layer and Append your animated model in it.
  3. Play the animation, set the animation range to the proper value - the one you used in the appended file. Keep it playing while you configure your cameras.
  4. Select the model's armature in object mode and scale it up/down if needed, position it in Z and Y so it is centered in all 4 views.
  5. Go to the layer of the camera controls and use the "y offset" controller to position in center your character on the bottom two views.camera controls layer
  6. Use the "heightCtrl" to set the Z angle of rendering (height) you want to see your character in.
  7. Use the "spriteRenderCams-globalCtr" properties (N-panel) To configure these optionally:
    1. Isometric angle - Rotates the camera rig on Z - this allows for isometric angle. Set to 45 to get diagonals.
    2. Ort scale - This can be used to zoom in/out the 4 cameras (orthographic)
    3. Persp/ortho - If set to 0, the cameras switch to perspective mode. It's recommended to keep at 1 (ortho)
    4. Persp focal lenght - This can be used to set the focal length of the 4 cameras (when in Perspective mode)
  8. Set your Rendering settings (Make sure you are at the a-Main scene if you aren't)
  9.  You can enable Freestyle optionally and set your linesets
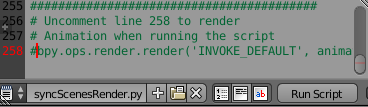
  10.  Run the script that I have provided in the blend file ("syncScenesRender.py") - always run it before rendering. It syncs the 4 scenes. Syncs your render settings, your freestyle linesets, makes sure everything on layer one is in all 4 scenes.runScript
  11.  Render single frame. A new folder called "output" will be created in the same directory where your spriteRenderKit.blend file is. Inside that folder you will find a single image from all 4 angles. See if you are happy with how it looks. See if the naming is correct. The sprite pointing to the left is named "left**.png" and the one pointing up is "up**.png" - whatever makes sense to you.
  12.  If they are not correctly named, you can rename them by selecting the appropriate output node and in it's n-panel change the "File Subpath" to the appropriate name. Keep the ##.renameSrk
  13.  Run the Sync script again and this time Render it as animation sequence. You will discover that the output folder is now populated will the frames. The script works with Blender Internal, Cycles and Freestyle.
  14. From here on you can use a tool such as shoebox to put all the frames in a single spritesheet. Alternatively you can use them as an image sequence - it all depends on the game engine you are using.

Where can I get this?

I am glad you asked. :)

Blender market (buy from here to also support blender!):
https://cgcookiemarkets.com/all-products/sprite-render-kit/

itch.io:
   
By getting it you also get my support in using it, any ideas you might have in improving it too.


Friday, May 22, 2015

Creating all the 3d graphics for a Kinect game - to teach kids how to cross the road


 A few months ago I just finished working on a game with Tri-soft.  It was created in Unity and was using Kinect for input.  The Goal of the game was to be a part of a larger event that is aiming to teach kids about road safety in a safe environment. The game came out and it even got some media coverage. Seeing as to how kinder-gardens and schools are using it now, I would class it as a successful project. You can watch the media coverage here (more pictures and video)
The deadline for it was tough. I had a month and a half to create ALL the 3d graphics in the game. The entire pipeline - including animations on three kids - one on a bicycle.
When we first started, the game was planned to be photo-realistic. It had no art style guide. So what I did was make one and offer it to the client - before doing any concept art or even modelling.  

I had to make sure that I know that they know what they want and I know what they want! :)
I offered them a short presentation of two styles - a cartoony one and a realistic one. Then left them to decide which one fits the target audience (little kids) more. The choice was obvious.

It was great that they went with the cartoony style, because it was much faster to produce (not requiring any normal maps) and it worked with the limitation of the old computers they have at the schools.
The target device handicap also forced the team to use Unity instead of Unreal engine.
 I couldn't get the game to look as good as I wanted to, due to the deadline. But I am somewhat happy that it is at least out there. Of course, I had to make some changes along the way to meet the client's demands. Also those ground textures were not my job.
For the characters:  After submitting a quick concept art drawing, I didn't get any reply so everything seemed fine. However when I got to the stage where the models of both kids were ready and textured, the client asked me to change the girl's dress completely, give her pigtails, change the boy's hair color and give him a red cap. In these cases, stuff like that always happens, but it is better to have something already made and easy to alter, instead of keep waiting for the client- halting the production. It's best to have something to give to the programmer to play with early on.
The changes were in part with the issue of having the game displayed with a digital projector. The colors were getting washed out and it was not easy enough to see on the screen in which direction the kid's head is looking- looking at it from behind. I had to use very bright colors. On why they wanted both kids to be blond - I have no idea :D
I had to use my time wisely. In order to meet the deadline and leave some extra time for unexpected issues and client demands (which of course there were some) - I planned the assets in a way in which I can reuse things. Even at the stage of the concept art, I designed all three kids very similarily - where shapes deform - so as to be able to reuse the geometry of the first one to create the other two. This also allowed me to partially reuse textures (instead of starting from scratch), reuse skin weights, the rig and partially even animations!
The kid on the bicycle was a bit more complicated. Due to the bicycle being partially controlled by player input, I had to create a rig for it in a very specific way. That required a lot of back and forth communication with the main programmer. Thankfully he was a great guy and helped out a lot technically.

Finally the last dynamic object in the game that had to be designed was the car! For the car I wanted something that looks like a toy. The programmer asked me kindly to use more realistic proportions for the car in terms of distance between the tires. This wasn't too big of a problem anyway. Both the car and the bicycle were made in a way that would allow him to control their steering and speed dynamically with code. That part I didnt have to animate at least. For the bicycle I did all the animations, in a way that would still leave him with some control.
After all that concept art and planning, it was time to do the actual models! Even when you look at their screenshot, you can really tell that they have the same base mesh (which probably is not a good thing, but time was not on my side)!


 For the buildings: A big part of the work was done in blender. The excellent modifier and instancing system allowed me to create a big number of assets very quickly and save a lot of time in UV unwrapping. 


 Before modelling anything, I went out with my camera and took reference images of real places and things. The school is based on a school that I used to go to. The kindergarden is the one I grew up in. Even the ugly Eastern European communist style Blocks in the game are based on one that I used to live in.


 Each model of a building was planned in advance - so as to pack textures in the most efficient way and use the smallest amount of geometry possible. In terms of UV unwrapping/texturing, it was important to take note in advance which were the repeating elements in a building and what Islands I can overlap or even flip in order to save uv space - giving each building texture more resolution if the client wants more detail later on.

There were quite a lot of buildings to make. Some of them had more than one different variations- In texture and in number of storeys. On storey variations I simply used the array modifier. There was also quite a lot of mesh instancing used and snapping.  When modelling all the assets, I kept them all in a single blend file that (at least in theory) had the correct units set to export and also had some consistency in art style.

Finally here is a trailer of the first version:

Most of all I am glad that the game was made for a good cause. I hope that none of these kids ever gets run over when crossing the street. Would be nice if they liked playing the game too of course. :)


Speaking of good causes...

I used Krita for texturing. It's vector layers and color adjustment layers made my life very easy. It even has ALOT of amazing features that photoshop does not have and probably wont get anytime soon. Things like brush stabilizing, more than one brush engines, layer instancing, wrap-around view mode (great for tiling texture painting), a vastly superior to the bucket tool  fill algorithm (via gmic), and many more are completely missing in photoshop at the moment. Krita is free and open source - unlike Photoshop it doesnt require monthly subscriptions and is available on Linux too!

They currently have a cool kickstarter campaign to fund development and bring more features. Most of all the campaign is to get krita to run faster than photoshop and to become a dedicated 2d Animation application as well - meaning a complete animation system - unlike the one in photoshop!

You can download it right now and start playing with it. The funding campaign comes with some great goodies- such as an awesome learning dvd course for example.

Tuesday, January 27, 2015

Gamejam 2015 - Ignite the Knight

I participated in this year's global game jam event - in Plovdiv. We were a 5 people team and we made a 2d html5 game. Gamejam offers only 48 hours to create a game. A big part of this time is taken by  other activities connected to the event.

My job in the team was to make nearly all the graphics in the game- all the environment art and player sprites!
You can see the GameJam entry here --  globalgamejam.org/2015/games/ignite-knight 

Play the game here online!

And a video Demo here:
 

Game Mechanics

The topic of this year's GameJam event was " What do we do now?".
We had a number of ideas for the game. Starting with a point and click game where the pilot has passed out drunk and you are one of the passengers trying to land the plane by guessing which button to press. We came up with variations of this idea with a boat and a bomb. But it all led to a game where guessing was the main mechanic and the player was not in control of the situation at all.

Next on we thought of a top down game, where the player is forced to navigate his/her way through a maze. In order to enforce the theme of gj2015, we made the floor collapse - forcing the player to constantly move.
I asked further to make the player continuously run in a direction - so it is impossible to stop moving.
The programmers were against it at first, but then after some talk on how it will help compliment the topic of the event and how to implement it, they caved in.

Part of the reason I wanted the continuous run mechanic was also the character design that I had in mind at the very start.


Animating the player Sprite:
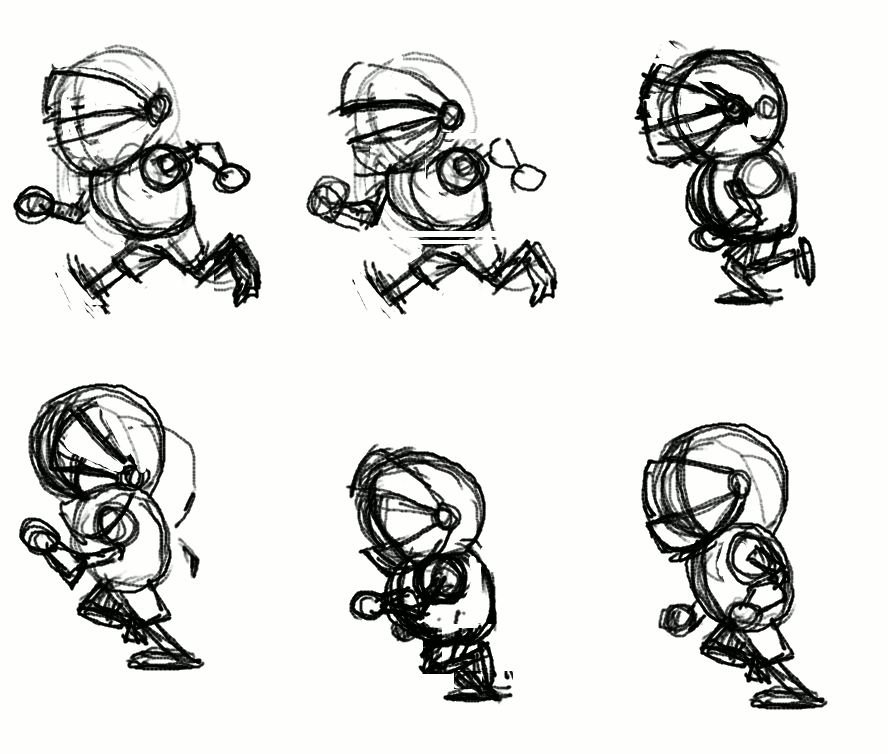

I started with a rough animation test in Pencil2d - which I gave to one of the programmers as a placeholder, so he had something to work with early
on. I made three placeholder sprites - side, front and back - of the run cycle! It is a bit messed up in the gif file here, so apologies.
The placeholder sprite is required to figure out how big the character will be on the screen and to implement the code for triggering the animation. This later on would drive some of the character design decisions- such as the thickness of the line, the size and amount of details, how tall he is and so on.


Modelling the Knight

Since the perspective in the game is top-down, the player sprite would require at least three versions for each animation it has. This led me to the idea of using Blender3d to make the sprite.
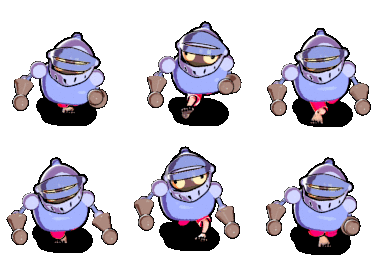
The idea behind the character is all aimed to compliment the continuous run gameplay mechanic. The knight has no shoes on and the floor is really really hot - running in his underwear, he is trying to get to the end. In this case the top half of his heavy armor is not helping the situation one bit. As you can see from the sketch, the character design is really really simple. It is taking into consideration how small the sprite would be on the screen. I modeled him out of really simple shapes - as quickly as possible. Then his colors were added via Vertext Painting - to skip the Uv unwrapping step altogether.  Since the final sprite would be 128x128 and the extreme limitation of our deadline, I couldnt afford to give him fingers.
I used rigify for the armature, but removed the bones in the hands and added extra bones for the helmet- to create a humorous secondary action later on.

Animating the Knight in blender

The knight has 5 actions in total:
Run, Idle (jumping on one place), Jump (over lava), Win, Die.
While working on the animations, I stumbled on some of the pet peeves that I have with blender's animation system and gui design. For example the lack of autoframe mode for f-curves and some other niceties that I missed from maya. I voiced my opinion at the forum.

The biggest problem came when blender wiped all of my animation data when closing the file- Without a warning! It nearly killed the project. Thankfully I already had my sprites rendered. However, It robbed me of the opportunity to further polish the animations and add a red ribbon on top of his helmet- for more secondary action.

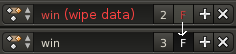
The automatic purge of animation clips , which by default have no user assigned to them is a decisgn decision in blender that has plagued a lot of users before me.  Blender deletes animation clips by default when you close your file and it doesnt warn you. One must click on a small "F" button in order to tell blender not to delete the animation.
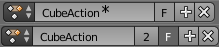
Since this terrible design has caused too many examples of data loss, I filed a bug report on the issue with the hope that developers will address it accordingly! For example Blender could warn you that it will delete a clip by color coding it and appending a "(wipe data)" message to its name or an asterisk symbol. I made a few mockups!
https://developer.blender.org/T43430#288111
While being at it, I also made a rant at blender artist about it and  suggested the Auto frame feature. One of the developers responded by making an implementation - to which I gave my feedback.


Rendering the sprite pipeline:
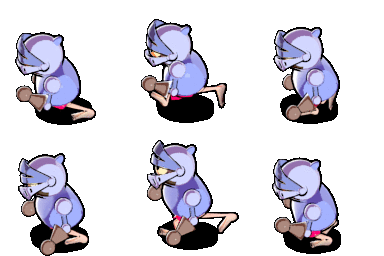

This project was a great way for me to test the latest version of my ADVANCED NPR SHADER -ver4 in a real production environment with a deadline. The shader gave the knight model a nice hand drawn style, which fits with the overall art direction of the game.
The cartoon line was achieved with the solidify modifier and another special outline shader.

Next on I had to set up the camera rig and the scenes. There are 3 scenes, which share a camera rig with 3 cameras- it was the only way to get blender to render a target from three different angles and give a conveniently rendered animation sequence for each action from three sides.


Painting the Tiling sprites for the Environment:


For the environment it was no brainer to use Krita. It has a feature that gives it a HUGE advantage over Photoshop - The wraparound (w) viewing mode  makes it very nice for painting tiling textures! Also the ability to clone layers, the numerous different brush engines and awesome interface. Krita is just wonderful.


Conclusions:

For this year's Game Jam event - I managed to meet most of my goals:
- The game we made was more ambitious and had much more graphics than the one from previous year!
- I used open source software for the entire pipeline! In the process I discovered bugs and design flaws, which were clearly voiced to the community and the developers of that software. I contributed back this way.
- I tested the Advanced NPR Shader -v4 in a real production environment with a sharp deadline. This shader will be made available some time in the future- along with a learning video course. It's one of my ongoing personal projects :)

In Other News: 
Gmic developers added a very useful feature that I suggested! This is exactly why I love open source software. Very often when you have an idea, the developer actually looks into it and if he likes it- BAM! It's right there a day after it was suggested:


The colorize filter is a great alternative to the traditional bucket fill tool. Give it a try. It's available in both Krita and Gimp.
-----------------------
Omake - some music I made with renoise in my free time:

Sunday, May 18, 2014

Advanced NPR Cell Shader ver 3 - and some thoughts on NPR lighting, and wishes for the BEER project


Ever since I released the Cell shader style material for Blender, there has been a rising number of people requesting from me to update it and continue developing it. I took some of your feedback and requests and managed to incorporate them in it. Admittedly there was also a huge break in which I kind of forgot about it as a whole, but some of you kept reminding me about it and I also kept remembering that I actually need to improve this material and add some features to it in order to continue production on SODA TRIP where the watercolory style is a must have.

So here it is! You can now download the cell shader - version 3 material from HERE:
Advanced Cell shader material version 3

Instructions how to use, some notes on new features and a wishlist to blender devs included in the video:

Advanced NPR Cell Shader 3 from todor imreorov on Vimeo.
The video contains some observations and ideas for b3d's npr renderer project- BEER.

New features:
- Watercolor effect!
- 2d screentones
- 2d gradients
- Receive shadows from external objects

- Textured mode and cells only mode
- Cell shading colorization
- Texture patches with multiply
- Spec bump pattern

-a much more modular and efficient node set up - under the hood.
The cell shader in completely modular - from version 2 and above! What's even better- it is much tidier. The matcap generator has become much tidier, easier to debug and extend. It is a part of the cell shader tools pipeline! This required a full redoing of node set ups from scratch.
Utility nodes (node groups) can be easily debugged, re-stacked and reused in different combinations and other shaders. These nodes are sort of like non destructive modifiers or effects.

Working on this cell shader allowed me to shape a number of concepts in my had as to how a potential NPR rendering engine would ideally work and what is currently missing in blender. You will hear some of these musings in the video anyway, but if you are too lazy to watch it- here is a summary:

Blender NPR BEER renderer ideas:
My wish for an ideal NPR shader is one that would allow me to use this sort of NPR effect modifiers on a per color-cell basis.
If freestyle has linesets, each of which has modifiers. A cell shader would have CELL sets, each of which would have cell shape/alpha modifiers (such as a watercolor effect, screentone effect and so on) and also cell color modifiers (such as 2d gradient, color patches, etc). 

Utility Nodes in version 3

Ideally a user would be able to set a cell set to receive shadows from isolated parts of itself and/or other objects. These geometry parts would be specifiable via a vertex group. So the user will be able to for example select only the nose to have a drop shadow, or only the chin to drop a shadow onto the neck. This is important for stylized shading. Just as important is also the ability to specify where you never want shadow to fall (example - the eyes) and where you never want  light to fall (example- inside the mouth). 
From there on it is kind of like the pipeline of my NPR cell shader material. Each cell goes through a number of modifiers that give the cell a specific style and flavor.
Once we get a greyscale render of all the cell sets, that information is then fed to the next stage of the process- THE COLOR STAGE.
In that stage we specify a texture or a vertex color layer as a base color. Then we can colorize the shading of each cell with a 2d gradient or a flat color- these things would ideally be keyframeable - so as to change them when the background is changed.
Additionally it would be nice to have the ability to have vertex based color patches that can also be keyframed, and also (tiling) texture patches. The option to operate on a cartoony character that is not UV unwrapped should be easily accessible.  

Then after all that is the Finessing stage.
In that stage you can add a rim light or a spec light- both of which can be made textury around the borders.

One of the design goals of this shader was to be flexible and to allow the artist to individually operate on elements. So it was important for me to separate cast shadows and normal based shadows - to be able to isolate and affect them with light and shadow masks; to be able to overlay color and texture patches, to affect the hue and saturation of cells; to be able to use 2d gradients and 2d screentones...

There are some other things on my wishlist, but these were and still are the big ones. There is more to be done to improve this shader, but there are also some annoying glsl bugs currently that trully discourage me from pushing it further to work on blender. 

Bugs encountered in blender:
However there are a couple of things in it that would break the glsl preview due to existing viewport limitations/bugs (as of 2.69)!

1. buffer shadows with "only shadow" option are pitch black in the glsl viewport. I filed a bug report for any developer interested in looking into it:
http://developer.blender.org/T37582

posted more about the limitation here:
http://blenderartists.org/forum/showthread.php?303682-Limitations-in-existing-Blender-features-you-would-like-to-see-resolved&p=2520945&viewfull=1#post2520945

2. For some reason using the screentones module (node group) or a 2d gradient (view/orco based vector) adds a white overlay on top of the material in glsl, but still works just fine as expected when rendering. It seems to be affecting the specular and rim light modules somehow.

3. Wishlist for Node groups in blender:
- A boolean switch (tick box) for 0/1 so we can have small switches instead of sliders when we want to enable/disable something.
- ability to expose drop down lists in the node group node- to select existing textures, vertex colors and other types of data. This would allow for a cleaner node material setup.