nav2

Showing posts with label 3d coat. Show all posts

Wednesday, May 18, 2016

Texturing PBR materials in 3D Coat and exporting to Unreal 4

3D coat generated an ambient occlusion and a curvature map for each object I painted in it - that way it knew how to paint in crevices that are stored in the imported normal map.
It was excellent in this regard as I found out that it can handle memory quite well when compared to Substance Painter. In 3d Coat I was able to get over 40+ layers on 2x2048 maps of 3 paint objects - with all channels + normal map. In substance painter - it just crashed on the second or third layer I made (preview texture set to a miserable 512).Even though my laptop is 7 years old - 3d coat handled this one quite gracefully.

For the skin I used one of the leather pbr shaders that came with 3dc and heavily altered it to make it look more like human skin.
Of course it is really difficult to fake SSS in real time. Unreal engine - which is the target engine for this character does have a SSS shader, but since the character will not get any closeups and not much of the skin is really revealed- I decided to be cheap again and stick with one material for the entire character. Before texturing the body I made an import test of the head/spray mask texture.

I set the texture maps in unreal in a way where the alpha channel of the diffuse is used to store the roughness map pass. I also wanted to use tha alpha channel of the normal map to store the metalic pass, but I found out that Unreal 4.10 does not allow using the alpha channel of a normal map texture if the file is a png. A few forums noted that it will work if I use targa instead - but targa is a huge file size and I thought i wont be saving a lot that way.


I imported my character with the unreal rig applied to it.
Here is the model - you should be able to preview it in your browser:


For the spray cans in the game I used an rgb map to split it into three areas - cap, sticker and can . The alpha channel of the sticker controls the sticker's mask in this case. That way the programmer on the project - Steve Stavrev can control the color of each instance of the spray and even change it dynamically during run time to create some interesting effect. 
His pose and animation is not my work - it is using one of the unreal project examples. Since my binding pose and the source binding pose are slightly different, the actual animation is a bit screwed up on the target. Unreal 4 supposedly has nice tools to adjust binding poses and when this issue is at hand, but I discovered that as I am writing this (4.10.4) there has been a bug for over an entire year that nobody from epic fixed that stops the users from doing that. I had to blindly set up the bones in blender, but the fingers are still screwed.
The best thing to do here for my portfolio is to actually make the animations myself, but unfortunately the freelance nature of the project dictates that we make do with this.

Sunday, May 15, 2016

Some notes on baking Normal maps again

Flipping UV islands is a common way of getting more pixels to cram in detail. What you do is for each symmetrical part of your model, you take the left side and flip it over the right side.

 That doesnt mean that the entire left side should be the same as the right - if you do that your model will of course be a bit bland. So plan in advance which parts you want to have symmetric and which not. You should plan it right from when you start making your high poly model.
In my case, I sculpted the nude in Zbrush completely from scratch, but used marvelous designer to create his outfit:

Making the hoodie was a  gotcha moment.I had to first stitch it in neutral pose over his head and run the simulation to get it to wrap around it naturally, then I puled it down to fall over his jacket during another cloth simulation. He looked good with a hoodie on, but the final design was planned  with a hat on instead.
Marvelous provided some really nice realistic cloth simulation which resulted in a good starting point for wrinkles and detail. Bringing the clothing back to Zbrush - I added detail to it - more wrinkles and a zipper here and there, the shoes and shoe laces. The hat, the hands and the respirator mask are all made in blender - where modelling them made much more sense. For the mask I used modifiers heavily. Wireframe modifier was perfect  for the cage.

Naturally the generated cloth mesh had no symmetry. So then when I started doing retopology in blender - the plan started forming more. For the outfit I will keep the middle part asymmetric, but will reuse the texture space of the sleeves. Same goes for the pants. His face will be completely unwrapped, but I will reuse uv texture space of the neck, the the cap shade and the shoes.


So I did the model accordingly in two stages- first retopo the asymmetric bits, then do the ones that reuse texture space - with a mirror modifier. I had to cut the hi poly model import from zbrush and marvelous designer into body parts and make the planned ones symmetrized for the high poly mesh - where there was no symmetry for the clothing. Thankfully blender has wonderful sculpting and modelling tools that make that part a walk in the park.

 When baking a normal for a target model with flipped islands that overlap their counterparts, you are most probably going to get seams.
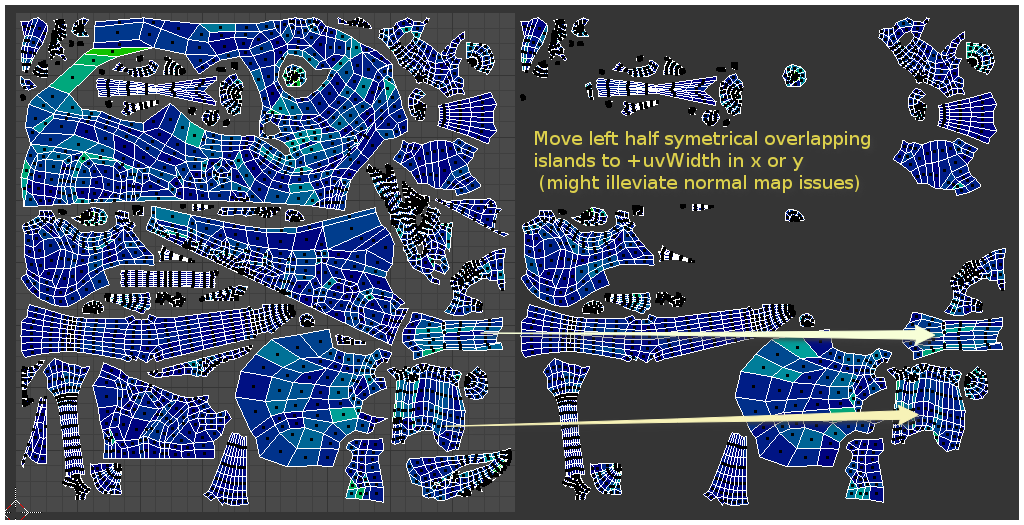
If you want to avoid it, but still be able to reuse texture space via flipped uv islands, it is important to do this: Select all islands that overlap other islands, and move them in X + texture.width.


As a side note you need to consider that this UV technique does not work if you need to bake a lightmap on the model - which is usually the case for static background objects.

For the mask normal baking, I arranged the uv islands in a way that it will bake the bars perfectly horizontally and vertically. It is generally a good practice to arrange your islands in a way where you will get less diagonal lines on the bake - try to avoid diagonal straight lines as a whole. Horizontal and Vertical lines have  no anti-aliasing you see - so geometric detail such as this looks much crisper on lower texture sizes. If you look at model rips from old video games - you will see that they utilized this approach quite successfully to get some good looking textures as small as 256 or even less. I was also being cheap again with reusing UV space  with a vertical mirror. Whenever you can, and especially for detailed parts with repeating elements - try to reuse texture space!

In most cases, you will still need to clean up the bake result.
The normal cleanup was done in Krita, as 3D-Coat does not allow cleaning up external normal maps. Their import layer is locked and limited to very few operations.
 It was however quite good at further detailing them during texturing with your PBR materials. Next post will be about that =)

Monday, May 5, 2014

Normal maps - Round two (3d Coat)- Dragon


I thought that my portfolio needs more detailed, game friendly 3d models. For that reason it was needed to tackle the subject of normal map baking yet again. I have done so in the past and looking at it retrospectively, that post didn't really reveal in a concise way the things that affect how a normal map bakes. So here goes my dragon experiment.

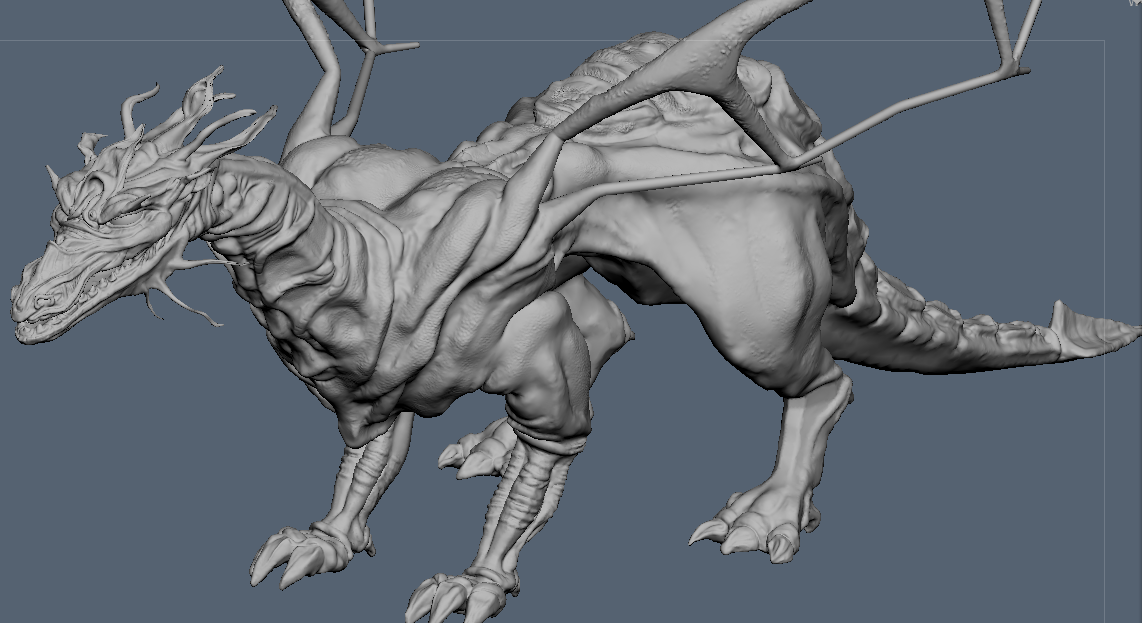
First off I used Blender to sculpt the dragon and push dyntopo to the test. I wanted to push it to it's limits on my dual core, 4gb ram laptop.
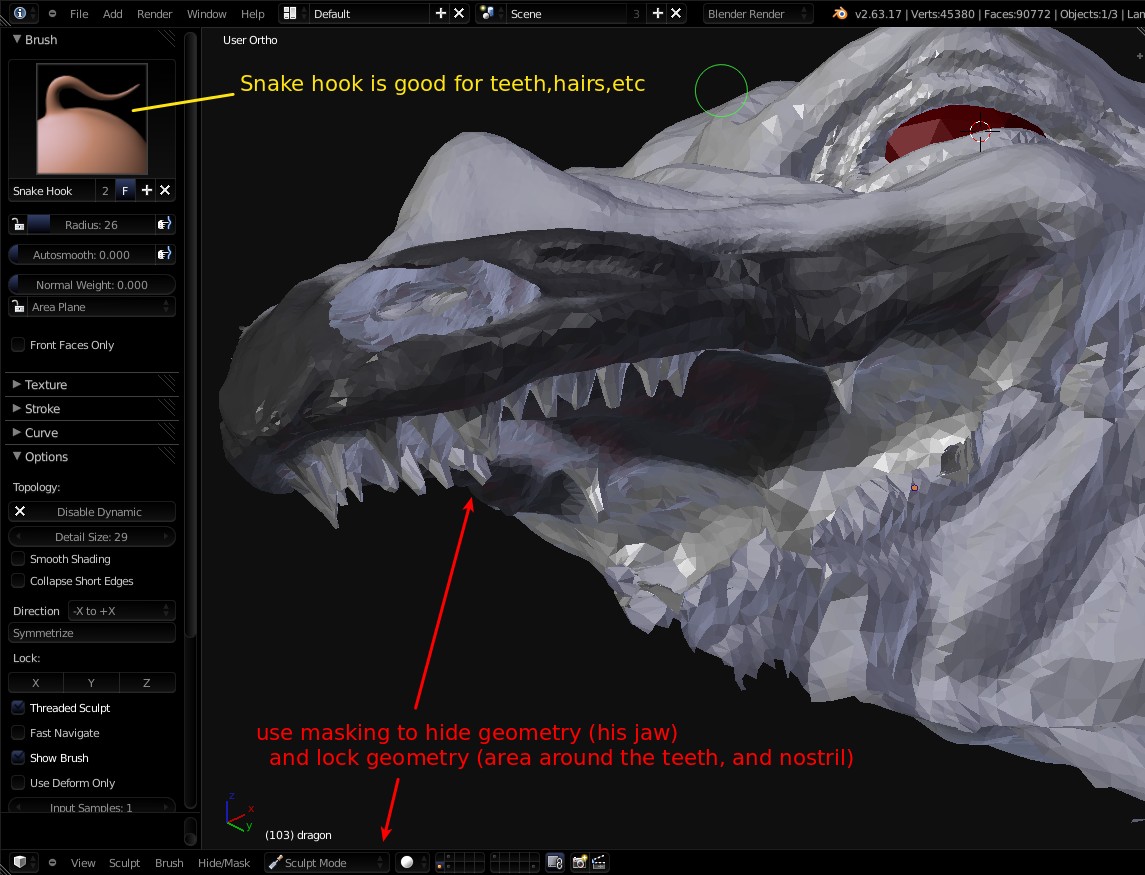
593 108 triangles seems to be the limit dyntopo can get to before becoming completely unusable. Now some of you might think - oh but  you can use lights instead of matcaps, you can disable double sided faces, switch off outline selected, turn on vbos, you can do this or that to speed up the viewport. I know about those tricks - they do help the viewport. It is not the viewport, it is dyntopo. The moment you turn on dynamic topology at that polycount , the screen freezes and lags extremely on every brush stroke.Optimize doesn't seem to do anything either. A trick would be to split the model to parts, but I didnt wanna do that. So at that point I just decided to continue working on this in 3d coat. It would be a fine opportunity to practice more in 3d coat.

I gave the model more detail there and played with the voxel room's tools. The rest of the pipeline I did in 3d coat. So what are the things that affect a normal map bake:


0. Topology - the retopology stage can be really important as to how your bake ends up looking like.
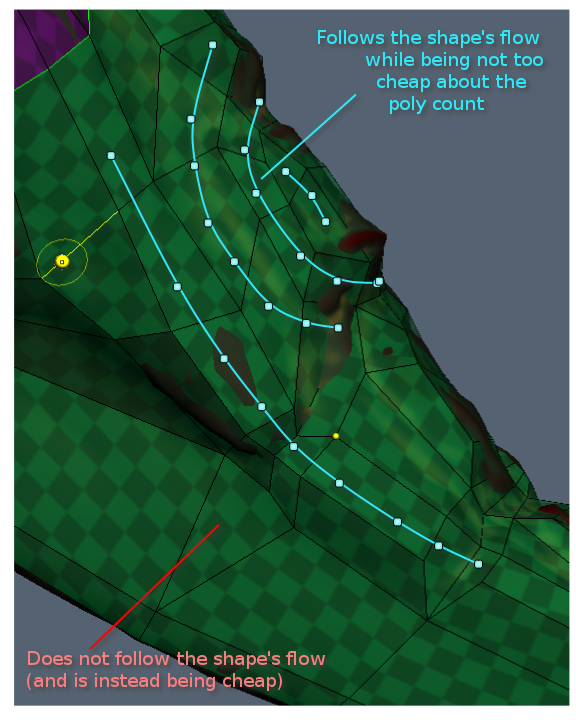
One must strive to have good edge flow not only for animation, but also for a better normal map- an optimal number of polygons to cover the high density mesh in a way that would best preserve it's silhouette. After all the silhouette will be the thing that would give away the fact that it's just a low poly model with a normal.

It is also good to note that weird edge flow used to reduce the polycount can cause problems further down the line. N-gons should be avoided. Triangles shouldn't be used at areas that will deform. Non-planar faces can be problematic too- some turn all polygons to triangles for that reason.

There are a lot of elements that can amount to a better normal map bake if you know about them. Since it's a big subject and I am certainly not an expert yet, you could try checking out Hai Phan's excellent video course on sculpting and baking.


1. UV unwrapping - is the next step of the pipeline that is key to the resolution of your normal map.
In previous posts here I have noted that one way to efficiently use UV space is to have folded and overlapping islands (left over right half). Since overlapping them could cause problems, another approach to have them reuse pixel space is to simply shift them in X or Y by exactly the size of your texture space. That way if you set your texture to "tiling" the outside of uv space islands will still get the detail. Other obvious points to rehash:
- Every uv seam is taxing a bit more the real time renderer. So a good rule of thumb would be to have less uv islands if you can. In example above I was just pressured by time to unwrap it faster. It's always easier to just have many islands.
- Try to pack the islands in a way that they use as much pixel space as possible.
- Try not to have any weird uv island overlap/twist upon itself. Example above has one island that way on purpose to test the possible issues that could arise during bake.
- Try to hide uv seams in areas where they are not likely to be seen from the common camera angles/character poses. Crevices are also a good spot to place them.

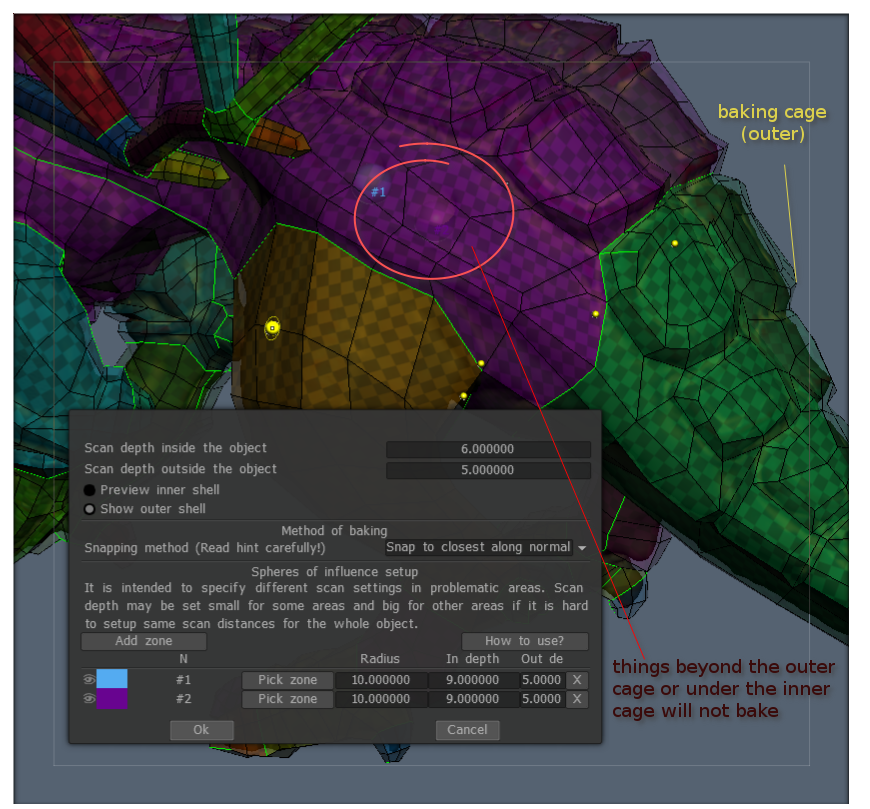
2. Baking (cages) - That is another thing Blender users can't enjoy at the moment I am writing this. 3d coat gives you the ability to easily set a baking cage. An inner and outer shells that would determine the range of the high density model. It's a nice way to reduce potential normal map garbage for cleaning up later on. But I found that it is still not enough to give a completely perfect bake on a complex model such as the dragon. So I still had to do some cleaning up.

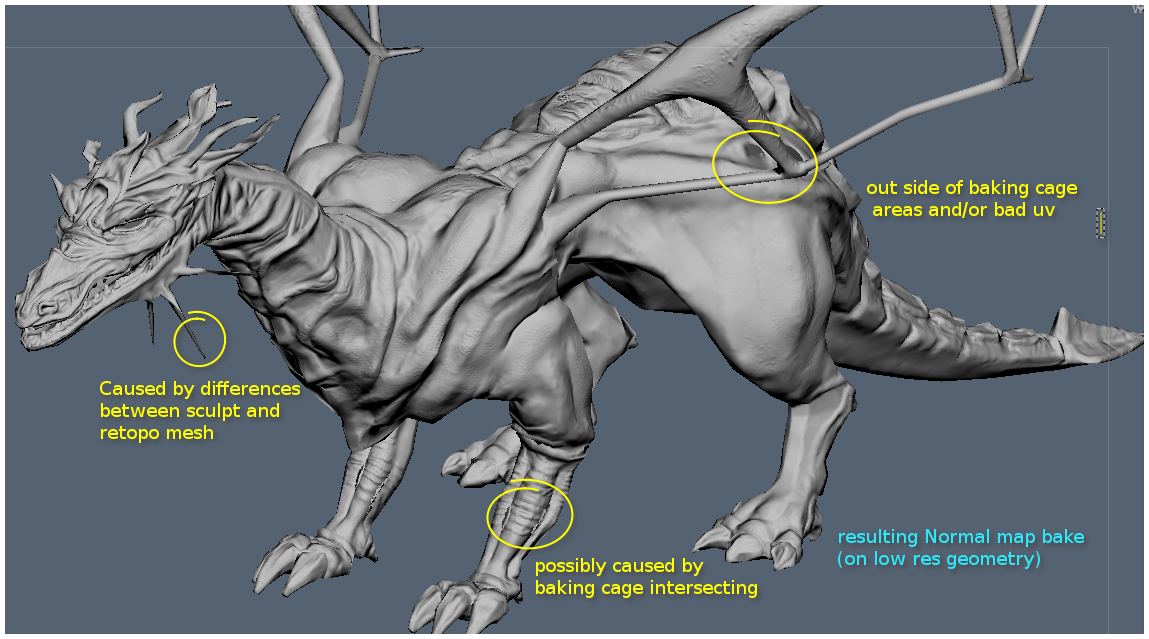
3. Dealing with holes and garbage in the normal map (clone tool)

At this point after getting my bake out, it is important to compare the low poly mesh with the normal to the high density mesh. Comparing the two reveals minor issues scattered all over the normal.

The easiest way I found to clean up those issues is by using the smudge, blur and clone brushes. These tools are well known to photoshop users, but can also be found in both 3d coat and blender.Finally I used a new bump layer in 3d coat to touch up the normal map- increase some crevices, smooth out some other areas. And another bump layer to add more fine detail such as scales/etc. And here is all that combined with a quick texture: 
In this post I do sort of compare 3d coat to blender. The truth is that both are excellent apps for 3d sculpting. Blender is still catching up on that front though. Some of it's current disadvantages are being worked on. If you want to support that development, consider donating to the blender foundation or joining the Blender Cloud!..


.

Wednesday, February 2, 2011

some models for the mocap and progress on pbank

The animation of piggy bank has gotten a bit longer than expected. The plan was 2 minutes and now its getting a little longer than 4. Truth be told, I hardly work on it lately because of all the other assignments and the part time jobs (I have two of them would you believe it). My plan is to render it when its absolutely perfect. If this was my job and I was getting my bills paid while working on it every day, I am pretty sure it would have been ready ages ago! It's the polishing that eats most of the time- getting those curves and the timing to work well. I am still relatively new to this 3d animation business, but that doesnt stop me from having high standards and be critical with the work.

You see, its not perfect and when its not perfect, I just dont render and post it. :)

It will be probably ready for the festivals this year, so anyone interested to send/suggest invite for events, please feel free to drop an email with the info.I do appreciate that sort of attention :)

The Mocap assignment
So this semester I signed up for one extra module that I believe will be a good addition to my portfolio, especially if I apply for work as an animator for video games. Motion Capture has been around for quite a while now in industry and we've all seen plenty of good ,bad and ugly examples of its use. My personal opinion about it is more or less the same as any other I've heard from classic animators. The truth is that the moCap data is often awkward when applied to the body of a character. I believe that is due to a number of reasons- one being the movement of the actor (often not an actor) not fitting the design of the character.The timing of the movement is too realistic and snappy, it has some random rubbish that needs to be cleaned up (like random gestures). It will never be able to replace good old fashioned animation, but it certainly will continue to be part of what industry needs, especially for sports games. What I hate about the majority of Mocap is just it's mediocrity and genericness.Generic people doing generic things- fighting, running with guns,doing some sports... That is why my goal with this module will be to give character to my characters, make them unique!

Speaking of the that, let me start by introducing them :

yet another character that I designed and modelled- I call him scissorman
Scissorman aka The Sepia Baron
I created this character as a tribute to classic horror game "Clock Tower".. You might notice my strange obsession with stripes is present here as well. He is kind of like a limping clown. The scissors are there to cut off the next character's head off.

rose creature concept
Plant man aka "The scarlet torn" is a character that I created a year ago. The idea for him came from my obsession with venecian masks+ Edgar Alan Poe's short story
I studied Philology back at the university of my country years ago, so that helped me develop some literary taste and some understanding of ancient to 19th century culture. Ok, enough bragging from me xD moving on

So as you imagine, I will have to model these characters. Well guess what, I already did. I want to talk a bit about the process and some tricks I developed to speed it up. Both characters took two days to model and I spent about 10 hours in total to do them both.
Starting with Z-brush, I first sculpted a high res plantman. Then retopo-ed and UV-ed it in 3d Coat. Getting him back in maya, I started adding the detail that will be on separate meshes (to ease skinning).

The hair, roses, thorns, leaves and so on was all made with CV curves in maya.

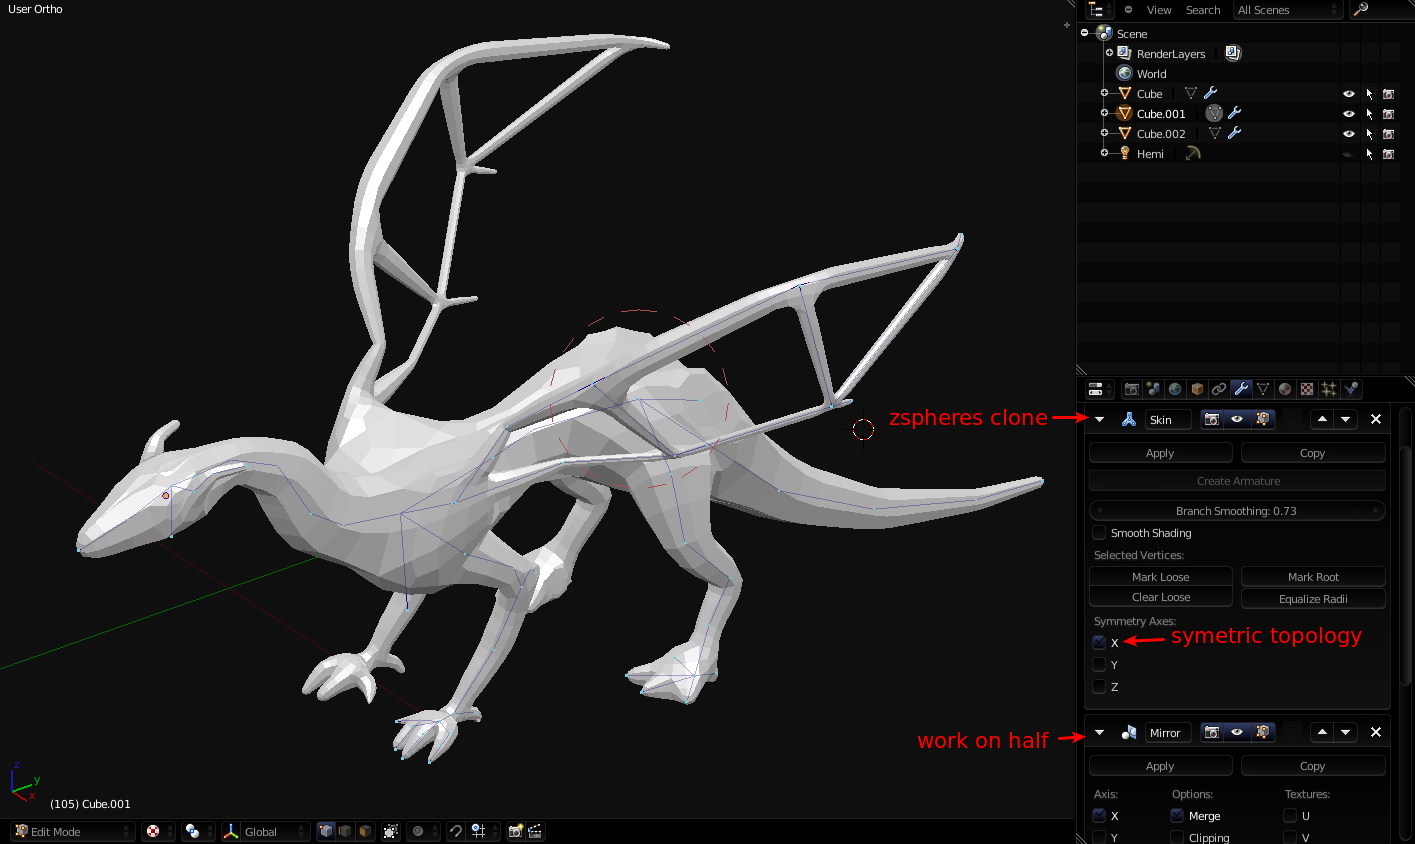
Moving on to scissorman,I did him from zspheres and there was no need to retopology, due the nature of his design- Just a bit of extra work in Maya to get the right amount of geometry where needed. I got to the conclusion that the bit that takes me the most time during modeling and is usually the most boring part is getting the topology of the hands right. So, I decided to make a set of hands to reuse in my pipeline, by just attaching them to the model. I made the first hand purely in Maya. It is as low poly as possible. Then I made 3 variations of it, each having a different number of vertices at the connection point- the wrist.


So I took one of them and just stitched it to scissorman and made some minor modifications in the shape. The topology is the best of what can be done on a non realistic character. I dont want to sound a bit arrogant by saying this and it usually happens when I am being critical, but I've seen ALOT of bad topology on hands on the internet. I know mine is no masterpiece too, but some of them real bad ones are being sold for a fortune at cg store websites. :D It's mind blowing. Have they no shame?


Moving on to UV mapping, I realized that I dont really need to use different space of one uv shell, if its going to be exactly the same as it's symmetrical counterpart. So when I uv-ed scissorman, I made sure that his left and right hands,arms, feet, and so on have the same uv shells. So after unwrapping them in Blender (of course- because its much much much better than maya at this) what I did was flip over and lay the left side uv shells over the right side ones. So the left and right hand of the character would occupy exactly the same place in UV space.

The one disadvantage of this is the obvious inability to be asymetrical with the texture.
The advantages are too good to pass on though- Not only do I have to paint only one side of the model at certain parts, but I get to give them all more UV space, more pixels for the texture!


The mocap data is going to be put into short loop sequences that can be used for a game. So the big picture is , if this works out nicely, we will be able to assemble a team of other students from gamings course and import this stuff in a mini UDK or other engine project. I am not going to go into detail about the game at this point, as it is not clear if it all will work out..