nav2

Showing posts with label krita. Show all posts

Friday, May 13, 2016

Feature proposal - vector eraser that erases strokes up to intersections


Very often when cleaning an ink drawing, the artist will need to clean up line overshoots. A good example of this is hair, but it applies to many places in a drawing.
In vector software, we tend to favor line overshoots, because that way we know for sure that our shapes will be closed off and ready for the bucket tool.
The first time I see this idea applied in an open source project is in  OpenToonz - the 'Remove Vector Overflow' command. This is where this command is supposed to come in and save the day.
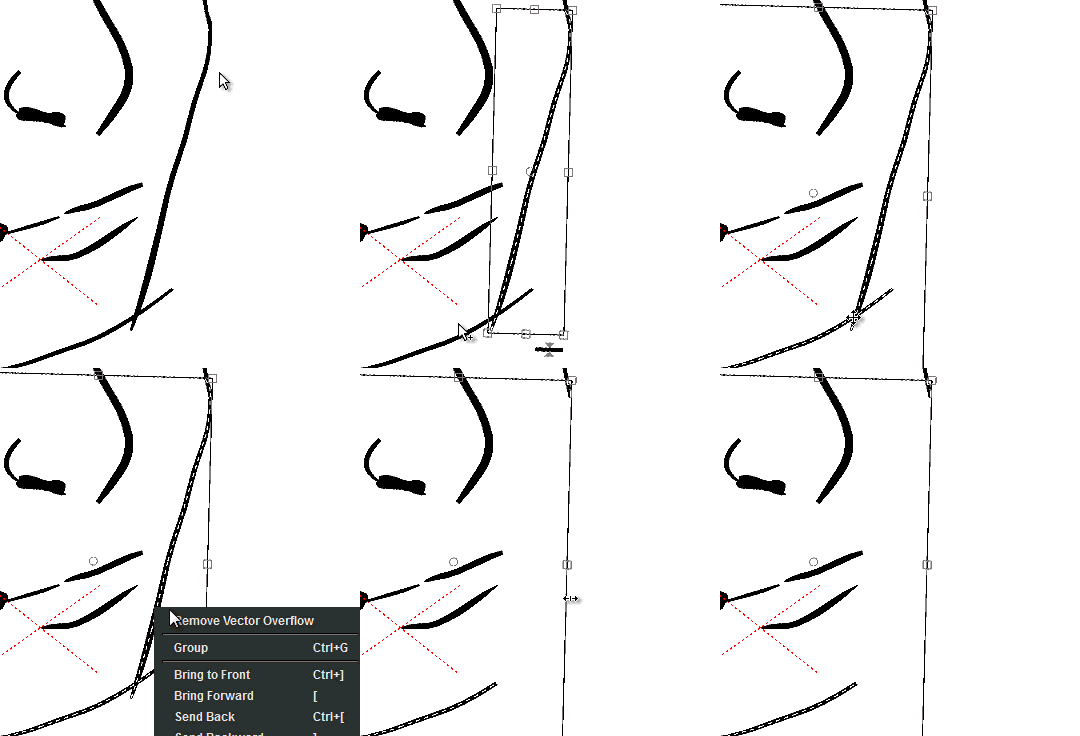
It however hardly works. Very often it does noting at all.In fact almost 80% of the time when you select two overshooting individual lines, nothing happens, or it erases parts of the lines you want to keep.
My suggestion here is to add two new modes to the eraser tool - when you are using it on a vector level. These two modes can already be found in other software such as toonboom, clip paint studio and last but not least - inkscape:

A. Erase up to intersection - This can be found in both Toonboom and clip paint studio. What it does is it erases the lines up to the intersection point - where they intersect with another line. Clip paint studio has it as an eraser tool mode and it works excellently.
Toonboom has two strategies to deal with this. One is the one clip paint uses. But as a second strategy - there is an option in the brush tool - to always create a new node where the stroke you drew overlapped another stroke. From there on it is easy to erase all the nodes exactly to that point and you dont need to move nodes around to get them to overlap. Another strategy with the brush tool is to automatically snap the beginning and end of a line to a closeby node of another line or the line itself (toonboom). Inkscape allows you to continue previously drawn lines - but unfortunately works at the end points of lines and is very limited.

B. Object mode eraser- very often the artist would require to erase entire strokes of a drawing - every stroke is a vector object. Right now in OT you have to go to the select tool, select the strokes and hit delete, then go back to the eraser tool to continue working. In inkscape the eraser tool can also erase entire strokes like this:
The implementation in OT almost never works in practice. It works when you draw a simple square, but when you draw a character and start trying it out - the one in clip paint does the job , while vector overflow in open toonz fails
I wonder how clip paint does it. It's the best one I've seen so far. Strokes there dont create nodes at intersections - so they must be somehow figuring out where the intersecting points are:
Here is my theory
--when the stylus starts a stroke in vector eraser mode:
1. Vector erase stroke collects a list of lines (like inkscape does in example B.) that you touched during the stroke.
--On release the following happens:
2. Instead of deleting the entire lines (which is an option also), it splits them all up at intersections points (cache result)
3. Using the result from step 2 , It marks the parts of the lines that your stroke has touched and deletes them
4. The lines that were split up (in step 2) are connected again
5. All the lines in the list of lines from step one are deleted and in their place are created the lines created by this operation.
To the user it looks like lines were deleted up to the intersection - just like it happens in the gif of example A .
Anyways, if i knew c++ i would have tried to figure out a way to make this. Hopefully a more experienced programmer will be interested.
So in order to implement a vector eraser mode that deletes lines up to intersections, you will first need to implement a mode in which it can collect a list of all the lines that it has touched.
You get two awesome vector erase modes in one!

Inkscape developers are much closer at achieving this tool, as they posses the main elements.
The default eraser tool mode already collects a list of lines that the stroke has touched.
The 'Cut Path' command can split a line where another overlapped it, it however deletes the line that overlapped it - which is something we do not want in this case!

Krita Developers - Are actually currently trying to collect funding via kickstarter to improve the vector tools in it. There is no statement made in the campaign that they are planning on adding such a mode to the vector eraser. It is not a stretch goal either. But in any case, I found out that some of them are quite aware of this tool in Clip Paint Studio. Whether we see it in Krita or not - only time will tell. It currently needs an entire rewrite of the vector system, but for that to happen they need your help:

If you haven't seen krita yet, feel free to give it a try. Downloads to the latest version are available at the kickstarter campaign page.

OpenToonz - The development of opentoonz is active as I write this, we will see if in the future they improve this feature. In any case, I filed it here #287 in their bug tracker.

Friday, May 22, 2015

Creating all the 3d graphics for a Kinect game - to teach kids how to cross the road


 A few months ago I just finished working on a game with Tri-soft.  It was created in Unity and was using Kinect for input.  The Goal of the game was to be a part of a larger event that is aiming to teach kids about road safety in a safe environment. The game came out and it even got some media coverage. Seeing as to how kinder-gardens and schools are using it now, I would class it as a successful project. You can watch the media coverage here (more pictures and video)
The deadline for it was tough. I had a month and a half to create ALL the 3d graphics in the game. The entire pipeline - including animations on three kids - one on a bicycle.
When we first started, the game was planned to be photo-realistic. It had no art style guide. So what I did was make one and offer it to the client - before doing any concept art or even modelling.  

I had to make sure that I know that they know what they want and I know what they want! :)
I offered them a short presentation of two styles - a cartoony one and a realistic one. Then left them to decide which one fits the target audience (little kids) more. The choice was obvious.

It was great that they went with the cartoony style, because it was much faster to produce (not requiring any normal maps) and it worked with the limitation of the old computers they have at the schools.
The target device handicap also forced the team to use Unity instead of Unreal engine.
 I couldn't get the game to look as good as I wanted to, due to the deadline. But I am somewhat happy that it is at least out there. Of course, I had to make some changes along the way to meet the client's demands. Also those ground textures were not my job.
For the characters:  After submitting a quick concept art drawing, I didn't get any reply so everything seemed fine. However when I got to the stage where the models of both kids were ready and textured, the client asked me to change the girl's dress completely, give her pigtails, change the boy's hair color and give him a red cap. In these cases, stuff like that always happens, but it is better to have something already made and easy to alter, instead of keep waiting for the client- halting the production. It's best to have something to give to the programmer to play with early on.
The changes were in part with the issue of having the game displayed with a digital projector. The colors were getting washed out and it was not easy enough to see on the screen in which direction the kid's head is looking- looking at it from behind. I had to use very bright colors. On why they wanted both kids to be blond - I have no idea :D
I had to use my time wisely. In order to meet the deadline and leave some extra time for unexpected issues and client demands (which of course there were some) - I planned the assets in a way in which I can reuse things. Even at the stage of the concept art, I designed all three kids very similarily - where shapes deform - so as to be able to reuse the geometry of the first one to create the other two. This also allowed me to partially reuse textures (instead of starting from scratch), reuse skin weights, the rig and partially even animations!
The kid on the bicycle was a bit more complicated. Due to the bicycle being partially controlled by player input, I had to create a rig for it in a very specific way. That required a lot of back and forth communication with the main programmer. Thankfully he was a great guy and helped out a lot technically.

Finally the last dynamic object in the game that had to be designed was the car! For the car I wanted something that looks like a toy. The programmer asked me kindly to use more realistic proportions for the car in terms of distance between the tires. This wasn't too big of a problem anyway. Both the car and the bicycle were made in a way that would allow him to control their steering and speed dynamically with code. That part I didnt have to animate at least. For the bicycle I did all the animations, in a way that would still leave him with some control.
After all that concept art and planning, it was time to do the actual models! Even when you look at their screenshot, you can really tell that they have the same base mesh (which probably is not a good thing, but time was not on my side)!


 For the buildings: A big part of the work was done in blender. The excellent modifier and instancing system allowed me to create a big number of assets very quickly and save a lot of time in UV unwrapping. 


 Before modelling anything, I went out with my camera and took reference images of real places and things. The school is based on a school that I used to go to. The kindergarden is the one I grew up in. Even the ugly Eastern European communist style Blocks in the game are based on one that I used to live in.


 Each model of a building was planned in advance - so as to pack textures in the most efficient way and use the smallest amount of geometry possible. In terms of UV unwrapping/texturing, it was important to take note in advance which were the repeating elements in a building and what Islands I can overlap or even flip in order to save uv space - giving each building texture more resolution if the client wants more detail later on.

There were quite a lot of buildings to make. Some of them had more than one different variations- In texture and in number of storeys. On storey variations I simply used the array modifier. There was also quite a lot of mesh instancing used and snapping.  When modelling all the assets, I kept them all in a single blend file that (at least in theory) had the correct units set to export and also had some consistency in art style.

Finally here is a trailer of the first version:

Most of all I am glad that the game was made for a good cause. I hope that none of these kids ever gets run over when crossing the street. Would be nice if they liked playing the game too of course. :)


Speaking of good causes...

I used Krita for texturing. It's vector layers and color adjustment layers made my life very easy. It even has ALOT of amazing features that photoshop does not have and probably wont get anytime soon. Things like brush stabilizing, more than one brush engines, layer instancing, wrap-around view mode (great for tiling texture painting), a vastly superior to the bucket tool  fill algorithm (via gmic), and many more are completely missing in photoshop at the moment. Krita is free and open source - unlike Photoshop it doesnt require monthly subscriptions and is available on Linux too!

They currently have a cool kickstarter campaign to fund development and bring more features. Most of all the campaign is to get krita to run faster than photoshop and to become a dedicated 2d Animation application as well - meaning a complete animation system - unlike the one in photoshop!

You can download it right now and start playing with it. The funding campaign comes with some great goodies- such as an awesome learning dvd course for example.

Tuesday, January 27, 2015

Gamejam 2015 - Ignite the Knight

I participated in this year's global game jam event - in Plovdiv. We were a 5 people team and we made a 2d html5 game. Gamejam offers only 48 hours to create a game. A big part of this time is taken by  other activities connected to the event.

My job in the team was to make nearly all the graphics in the game- all the environment art and player sprites!
You can see the GameJam entry here --  globalgamejam.org/2015/games/ignite-knight 

Play the game here online!

And a video Demo here:
 

Game Mechanics

The topic of this year's GameJam event was " What do we do now?".
We had a number of ideas for the game. Starting with a point and click game where the pilot has passed out drunk and you are one of the passengers trying to land the plane by guessing which button to press. We came up with variations of this idea with a boat and a bomb. But it all led to a game where guessing was the main mechanic and the player was not in control of the situation at all.

Next on we thought of a top down game, where the player is forced to navigate his/her way through a maze. In order to enforce the theme of gj2015, we made the floor collapse - forcing the player to constantly move.
I asked further to make the player continuously run in a direction - so it is impossible to stop moving.
The programmers were against it at first, but then after some talk on how it will help compliment the topic of the event and how to implement it, they caved in.

Part of the reason I wanted the continuous run mechanic was also the character design that I had in mind at the very start.


Animating the player Sprite:


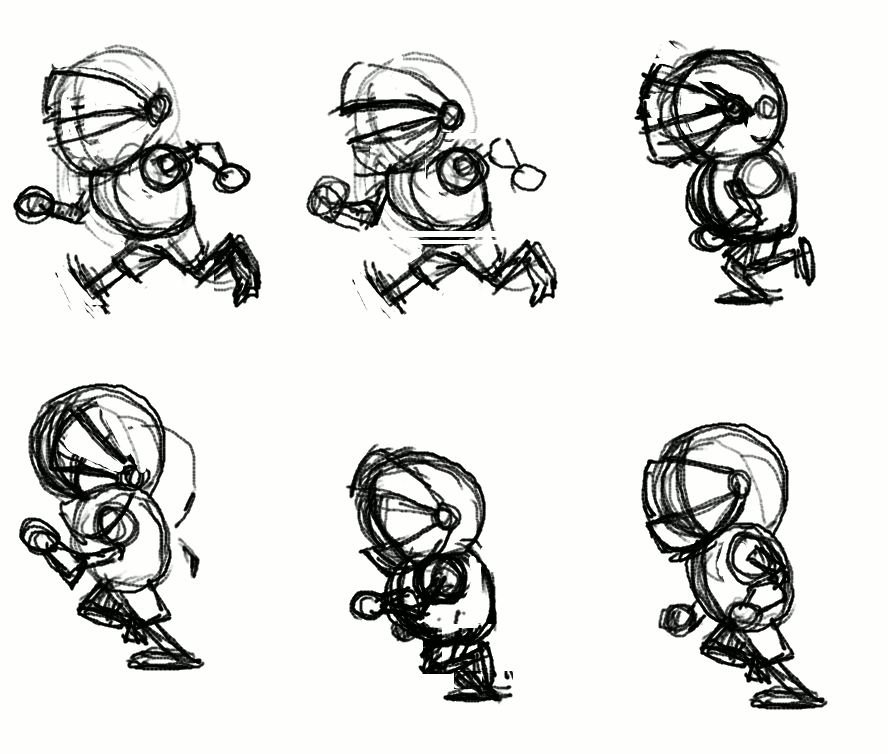
I started with a rough animation test in Pencil2d - which I gave to one of the programmers as a placeholder, so he had something to work with early
on. I made three placeholder sprites - side, front and back - of the run cycle! It is a bit messed up in the gif file here, so apologies.
The placeholder sprite is required to figure out how big the character will be on the screen and to implement the code for triggering the animation. This later on would drive some of the character design decisions- such as the thickness of the line, the size and amount of details, how tall he is and so on.


Modelling the Knight

Since the perspective in the game is top-down, the player sprite would require at least three versions for each animation it has. This led me to the idea of using Blender3d to make the sprite.
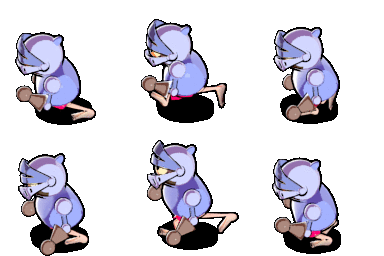
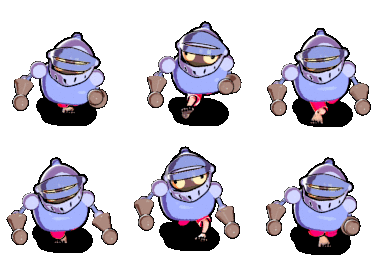
The idea behind the character is all aimed to compliment the continuous run gameplay mechanic. The knight has no shoes on and the floor is really really hot - running in his underwear, he is trying to get to the end. In this case the top half of his heavy armor is not helping the situation one bit. As you can see from the sketch, the character design is really really simple. It is taking into consideration how small the sprite would be on the screen. I modeled him out of really simple shapes - as quickly as possible. Then his colors were added via Vertext Painting - to skip the Uv unwrapping step altogether.  Since the final sprite would be 128x128 and the extreme limitation of our deadline, I couldnt afford to give him fingers.
I used rigify for the armature, but removed the bones in the hands and added extra bones for the helmet- to create a humorous secondary action later on.

Animating the Knight in blender

The knight has 5 actions in total:
Run, Idle (jumping on one place), Jump (over lava), Win, Die.
While working on the animations, I stumbled on some of the pet peeves that I have with blender's animation system and gui design. For example the lack of autoframe mode for f-curves and some other niceties that I missed from maya. I voiced my opinion at the forum.

The biggest problem came when blender wiped all of my animation data when closing the file- Without a warning! It nearly killed the project. Thankfully I already had my sprites rendered. However, It robbed me of the opportunity to further polish the animations and add a red ribbon on top of his helmet- for more secondary action.

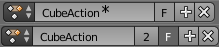
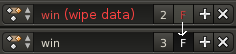
The automatic purge of animation clips , which by default have no user assigned to them is a decisgn decision in blender that has plagued a lot of users before me.  Blender deletes animation clips by default when you close your file and it doesnt warn you. One must click on a small "F" button in order to tell blender not to delete the animation.
Since this terrible design has caused too many examples of data loss, I filed a bug report on the issue with the hope that developers will address it accordingly! For example Blender could warn you that it will delete a clip by color coding it and appending a "(wipe data)" message to its name or an asterisk symbol. I made a few mockups!
https://developer.blender.org/T43430#288111
While being at it, I also made a rant at blender artist about it and  suggested the Auto frame feature. One of the developers responded by making an implementation - to which I gave my feedback.


Rendering the sprite pipeline:


This project was a great way for me to test the latest version of my ADVANCED NPR SHADER -ver4 in a real production environment with a deadline. The shader gave the knight model a nice hand drawn style, which fits with the overall art direction of the game.
The cartoon line was achieved with the solidify modifier and another special outline shader.

Next on I had to set up the camera rig and the scenes. There are 3 scenes, which share a camera rig with 3 cameras- it was the only way to get blender to render a target from three different angles and give a conveniently rendered animation sequence for each action from three sides.


Painting the Tiling sprites for the Environment:


For the environment it was no brainer to use Krita. It has a feature that gives it a HUGE advantage over Photoshop - The wraparound (w) viewing mode  makes it very nice for painting tiling textures! Also the ability to clone layers, the numerous different brush engines and awesome interface. Krita is just wonderful.


Conclusions:

For this year's Game Jam event - I managed to meet most of my goals:
- The game we made was more ambitious and had much more graphics than the one from previous year!
- I used open source software for the entire pipeline! In the process I discovered bugs and design flaws, which were clearly voiced to the community and the developers of that software. I contributed back this way.
- I tested the Advanced NPR Shader -v4 in a real production environment with a sharp deadline. This shader will be made available some time in the future- along with a learning video course. It's one of my ongoing personal projects :)

In Other News: 
Gmic developers added a very useful feature that I suggested! This is exactly why I love open source software. Very often when you have an idea, the developer actually looks into it and if he likes it- BAM! It's right there a day after it was suggested:


The colorize filter is a great alternative to the traditional bucket fill tool. Give it a try. It's available in both Krita and Gimp.
-----------------------
Omake - some music I made with renoise in my free time: