nav2

Showing posts with label animation. Show all posts

Sunday, August 28, 2016

Job applications - happy villager

I had a call from an agency a couple of months ago. They forwarded my portfolio to a studio in London. The studio was looking for an animator/rigger with experience in Unity3d and mobile games. My previous experience was close to what they were looking for and that got me to the interview stage. They interviewed me via Skype and explained that the final stage would be a test for which I have 4 hours to complete and send.
The test was on the following week. When I got the project file the clock started ticking. I didn't know what to expect prior to getting it. What I got was just body parts in black and white , and a reference image (on the right). The goal was to rig the character and animate a happy emotion that is up to 4 seconds long.
Rigging the character took about an hour. I arranged some elements into their own subfolders. The hierarchy of elements was key to getting the animation polished quicker. For example I put all face controls under a facedir node - that would allow me to turn her head with less keyframes to manage.
The minimalist character design was a good thing in this case - even with the imposed limitations -such as for example the lack of joints in the legs. I worked with what I had.

All and all they never did give me a call. Instead the agency told me that I have passed their test and they really liked my work. However the CEO has decided to hire somebody that they already know from previous projects instead.

Normally I wouldn't share work done for others, but given how I did not get paid in this case, how they didn't give me personal feedback and also that there was no NDA signed, I feel absolutely free to share this here :)

The animation has a drop in frames, because it is captured from Unity with capture software. When running, it is as smooth as butter 60fps. Thus why all I could get out of the whole experience is now the gif file you see above and the unity project.

If you are looking for an animator with rigging experience - who can do the rigging and the entire animation in Unity alone - I can send you this test file to review it yourself.


Monday, February 16, 2015

Some hired work from the 2011 - graphics and mockups for tablet games

Back in 2011, I had the pleasure of signing up for a part time job with Cogworks studios  -as artist/animator . I made graphics and mockups for a bunch of iOS games/Apps. There was an opportunity to go full time, however I was in the middle of my second year at the University of Bradford - there were a lot of assignments stopping me from doing that. Also UK students are not allowed to work for more than 20 hours per week.


We used toggl to track my time each month. Sadly university took a lot of it and as you can see from one of my reports- I wasnt able to spend too much on concepts.

There was of course a non disclosure agreement with the job. Those type of agreements usually have a period of time - in this case 3 years - in which I am not allowed to release any information or show any of my work publicly. Well since 4 years passed I said to myself - What the heck, Let's do it. I am going to share with you some of the more fun ones. :)

Please note that some of these were quickly made sprites - used to put together a prototype for a few games. They were in no shape or form the final product. The names I am giving the games are not the final product names.

One of the projects was to do a game in a frame concept for Team 17. The deadline was very tight, so it's not very polished. I am not going to go into detail about the game ideas or design, since none of that was my work.

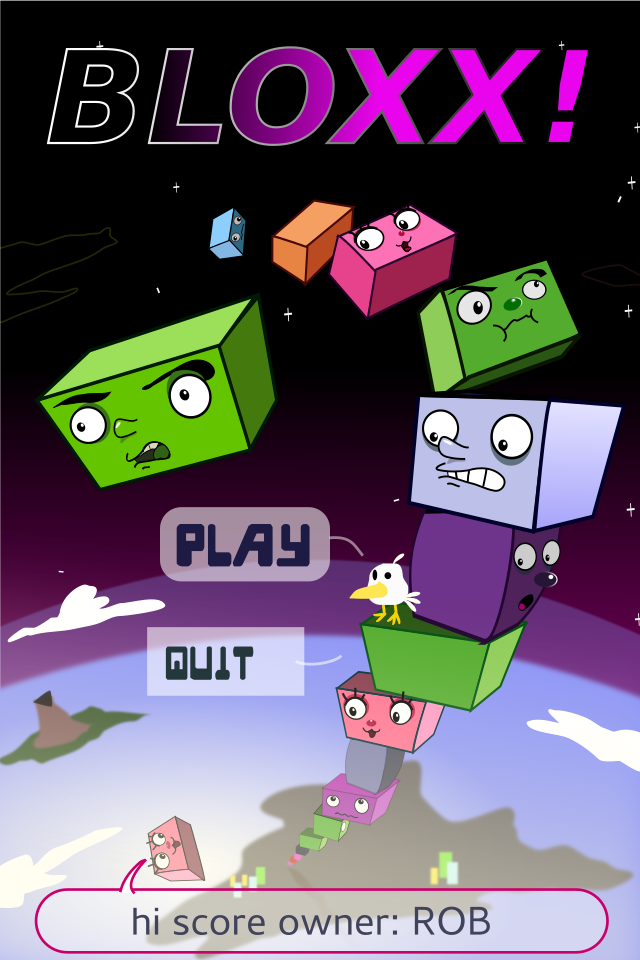
There was another ongoing project for a Jenga-like game where you stock blocks ontop of each other. I made a title screen, two backgrounds and animated sprites for the blocks. Each block had a face with a different character. Doing the backgrounds was really fun, since they were vertically very tall. We had a level where you stack blocks all the way into space, another one which started deep underwater and kept going until reaching the surface and so on. I had to use illustrator on that one, since it had better export tools.


There was a Bird in a factory game project where I made a number of bird concepts for. Then when we picked one of them - I made a fully playable animated sprite for the bird- run, idle, death, etc.
Some of the background elements also had to be animated - smoke, saw, travolator, etc etc. Those were simple enough to just do in Inkskape. I had set up for myself a script in linux that exports the svg layers as an image sequence. And another one which makes a gif file from the image sequence  (for presentation purposes). That saved a lot of time.

 I made an entire spritesheet in inkscape. There was no premade concept art, but the guys at Cogworks gave me some direction as to what animations they are going to need and some of the specific gameplay event items. I had some creative freedom in coming up with various hazards for the little bird though.

Overall these were fun projects for me and working with Cogworks was a real pleasure!
I do hope that they get to complete/release some of these games some day. Looking at my work from 4 years ago, I can't say that I am completely pleased with it. Surely it can do with a lot more polish! If these games ever get on production schedule, I would be more than happy to work on them full time.

Tuesday, January 27, 2015

Gamejam 2015 - Ignite the Knight

I participated in this year's global game jam event - in Plovdiv. We were a 5 people team and we made a 2d html5 game. Gamejam offers only 48 hours to create a game. A big part of this time is taken by  other activities connected to the event.

My job in the team was to make nearly all the graphics in the game- all the environment art and player sprites!
You can see the GameJam entry here --  globalgamejam.org/2015/games/ignite-knight 

Play the game here online!

And a video Demo here:
 

Game Mechanics

The topic of this year's GameJam event was " What do we do now?".
We had a number of ideas for the game. Starting with a point and click game where the pilot has passed out drunk and you are one of the passengers trying to land the plane by guessing which button to press. We came up with variations of this idea with a boat and a bomb. But it all led to a game where guessing was the main mechanic and the player was not in control of the situation at all.

Next on we thought of a top down game, where the player is forced to navigate his/her way through a maze. In order to enforce the theme of gj2015, we made the floor collapse - forcing the player to constantly move.
I asked further to make the player continuously run in a direction - so it is impossible to stop moving.
The programmers were against it at first, but then after some talk on how it will help compliment the topic of the event and how to implement it, they caved in.

Part of the reason I wanted the continuous run mechanic was also the character design that I had in mind at the very start.


Animating the player Sprite:
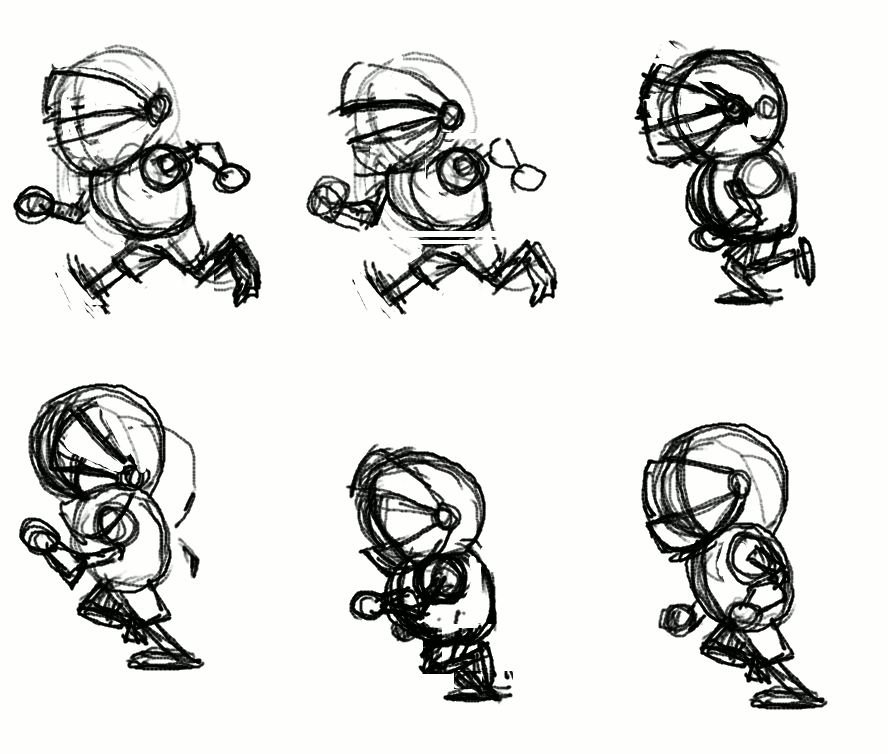

I started with a rough animation test in Pencil2d - which I gave to one of the programmers as a placeholder, so he had something to work with early
on. I made three placeholder sprites - side, front and back - of the run cycle! It is a bit messed up in the gif file here, so apologies.
The placeholder sprite is required to figure out how big the character will be on the screen and to implement the code for triggering the animation. This later on would drive some of the character design decisions- such as the thickness of the line, the size and amount of details, how tall he is and so on.


Modelling the Knight

Since the perspective in the game is top-down, the player sprite would require at least three versions for each animation it has. This led me to the idea of using Blender3d to make the sprite.
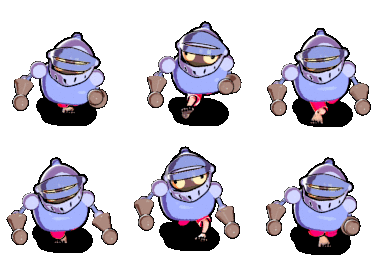
The idea behind the character is all aimed to compliment the continuous run gameplay mechanic. The knight has no shoes on and the floor is really really hot - running in his underwear, he is trying to get to the end. In this case the top half of his heavy armor is not helping the situation one bit. As you can see from the sketch, the character design is really really simple. It is taking into consideration how small the sprite would be on the screen. I modeled him out of really simple shapes - as quickly as possible. Then his colors were added via Vertext Painting - to skip the Uv unwrapping step altogether.  Since the final sprite would be 128x128 and the extreme limitation of our deadline, I couldnt afford to give him fingers.
I used rigify for the armature, but removed the bones in the hands and added extra bones for the helmet- to create a humorous secondary action later on.

Animating the Knight in blender

The knight has 5 actions in total:
Run, Idle (jumping on one place), Jump (over lava), Win, Die.
While working on the animations, I stumbled on some of the pet peeves that I have with blender's animation system and gui design. For example the lack of autoframe mode for f-curves and some other niceties that I missed from maya. I voiced my opinion at the forum.

The biggest problem came when blender wiped all of my animation data when closing the file- Without a warning! It nearly killed the project. Thankfully I already had my sprites rendered. However, It robbed me of the opportunity to further polish the animations and add a red ribbon on top of his helmet- for more secondary action.

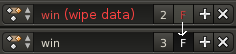
The automatic purge of animation clips , which by default have no user assigned to them is a decisgn decision in blender that has plagued a lot of users before me.  Blender deletes animation clips by default when you close your file and it doesnt warn you. One must click on a small "F" button in order to tell blender not to delete the animation.
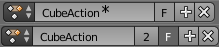
Since this terrible design has caused too many examples of data loss, I filed a bug report on the issue with the hope that developers will address it accordingly! For example Blender could warn you that it will delete a clip by color coding it and appending a "(wipe data)" message to its name or an asterisk symbol. I made a few mockups!
https://developer.blender.org/T43430#288111
While being at it, I also made a rant at blender artist about it and  suggested the Auto frame feature. One of the developers responded by making an implementation - to which I gave my feedback.


Rendering the sprite pipeline:
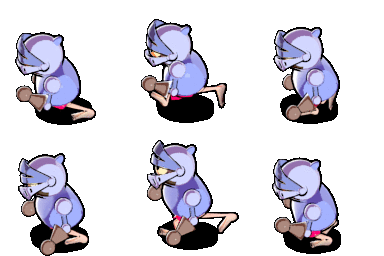

This project was a great way for me to test the latest version of my ADVANCED NPR SHADER -ver4 in a real production environment with a deadline. The shader gave the knight model a nice hand drawn style, which fits with the overall art direction of the game.
The cartoon line was achieved with the solidify modifier and another special outline shader.

Next on I had to set up the camera rig and the scenes. There are 3 scenes, which share a camera rig with 3 cameras- it was the only way to get blender to render a target from three different angles and give a conveniently rendered animation sequence for each action from three sides.


Painting the Tiling sprites for the Environment:


For the environment it was no brainer to use Krita. It has a feature that gives it a HUGE advantage over Photoshop - The wraparound (w) viewing mode  makes it very nice for painting tiling textures! Also the ability to clone layers, the numerous different brush engines and awesome interface. Krita is just wonderful.


Conclusions:

For this year's Game Jam event - I managed to meet most of my goals:
- The game we made was more ambitious and had much more graphics than the one from previous year!
- I used open source software for the entire pipeline! In the process I discovered bugs and design flaws, which were clearly voiced to the community and the developers of that software. I contributed back this way.
- I tested the Advanced NPR Shader -v4 in a real production environment with a sharp deadline. This shader will be made available some time in the future- along with a learning video course. It's one of my ongoing personal projects :)

In Other News: 
Gmic developers added a very useful feature that I suggested! This is exactly why I love open source software. Very often when you have an idea, the developer actually looks into it and if he likes it- BAM! It's right there a day after it was suggested:


The colorize filter is a great alternative to the traditional bucket fill tool. Give it a try. It's available in both Krita and Gimp.
-----------------------
Omake - some music I made with renoise in my free time:

Tuesday, January 28, 2014

Winning Game Jam plovdiv

This year we participated in the first global game jam event in my home town- Plovdiv.
"Team Chameleon" was formed out of 5 people: 2 programmers, one graphics guy (me) ,a musician, and a level designer.

You can play the game HERE in your browser.

And THIS is it's entry page- on the global game jam website.
Howto play the Demo:
Please note that the game doesnt have a loading screen yet, so you will need to wait a bit for the graphics to load from the web. 
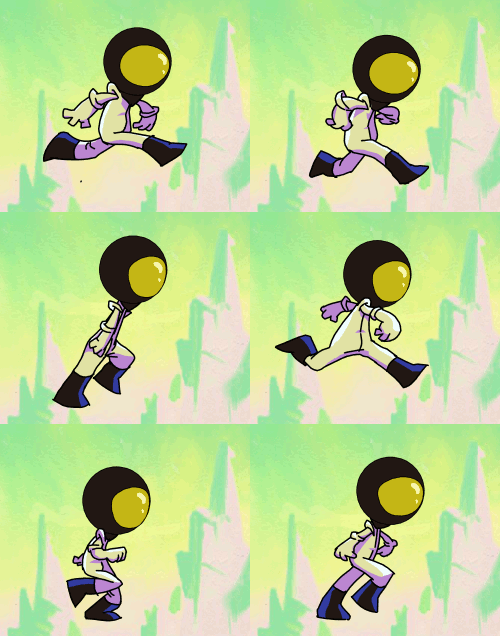
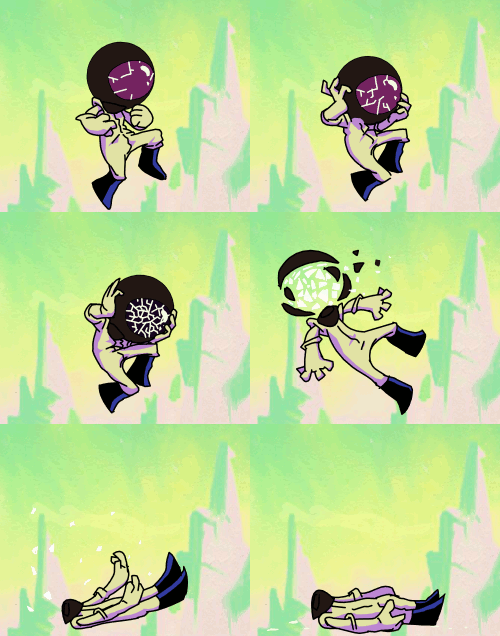
The astronaut can see in one of the 4 different color spectrums. Hit spacebar to switch between them and make their platforms visible. Also note that seeing in a color spectrum also makes you SEEN by the monsters that exist in that spectrum. The goal is to get to the bunker! :) 


The game won us the industry game jam award- given to us by gameloft!
------------------------
Organisation

During the first day of the event, when the topic was revealed:
"We don't see what we see, we see what we are" (or something like that)
All I did was wonder around and try to get to know people in the room - find out what their take on the theme was and also to see if I can find some programmers. 

The initial idea of the game is that we, as human beings have a limited perceiving of the world - for our eyes can not see the complete spectrum of light. This idea came to be after a chat with a color blind guy, whom I met at the event (what are the odds).
After finding 2 excellent programmers, or more like them finding me- we got together at the table and had to come up with a game pitch in less than 30 minutes!

For this part the best thing for me to do was to allow for everyone to shoot ideas and on my part-write them all down on a piece of paper and compile the pitch. 

Some of the ideas were:
- Colored vs black and white
- Perceiving things in a wrong way (in different colors)
- Seeing only things in certain colors.
- Forcing the player to memorize where platforms are
- Point and click items in a room in a sequence - in order to proceed to the next room (puzzle)
- Platforming (voted on this - it's a popular genre that people understand)
- At the end of the brainstorming session I enforced on the team the need for antagonism. Memorizing platforms is not enough to keep the players on their toes. Thus enemies need to be hidden in every color spectrum.  

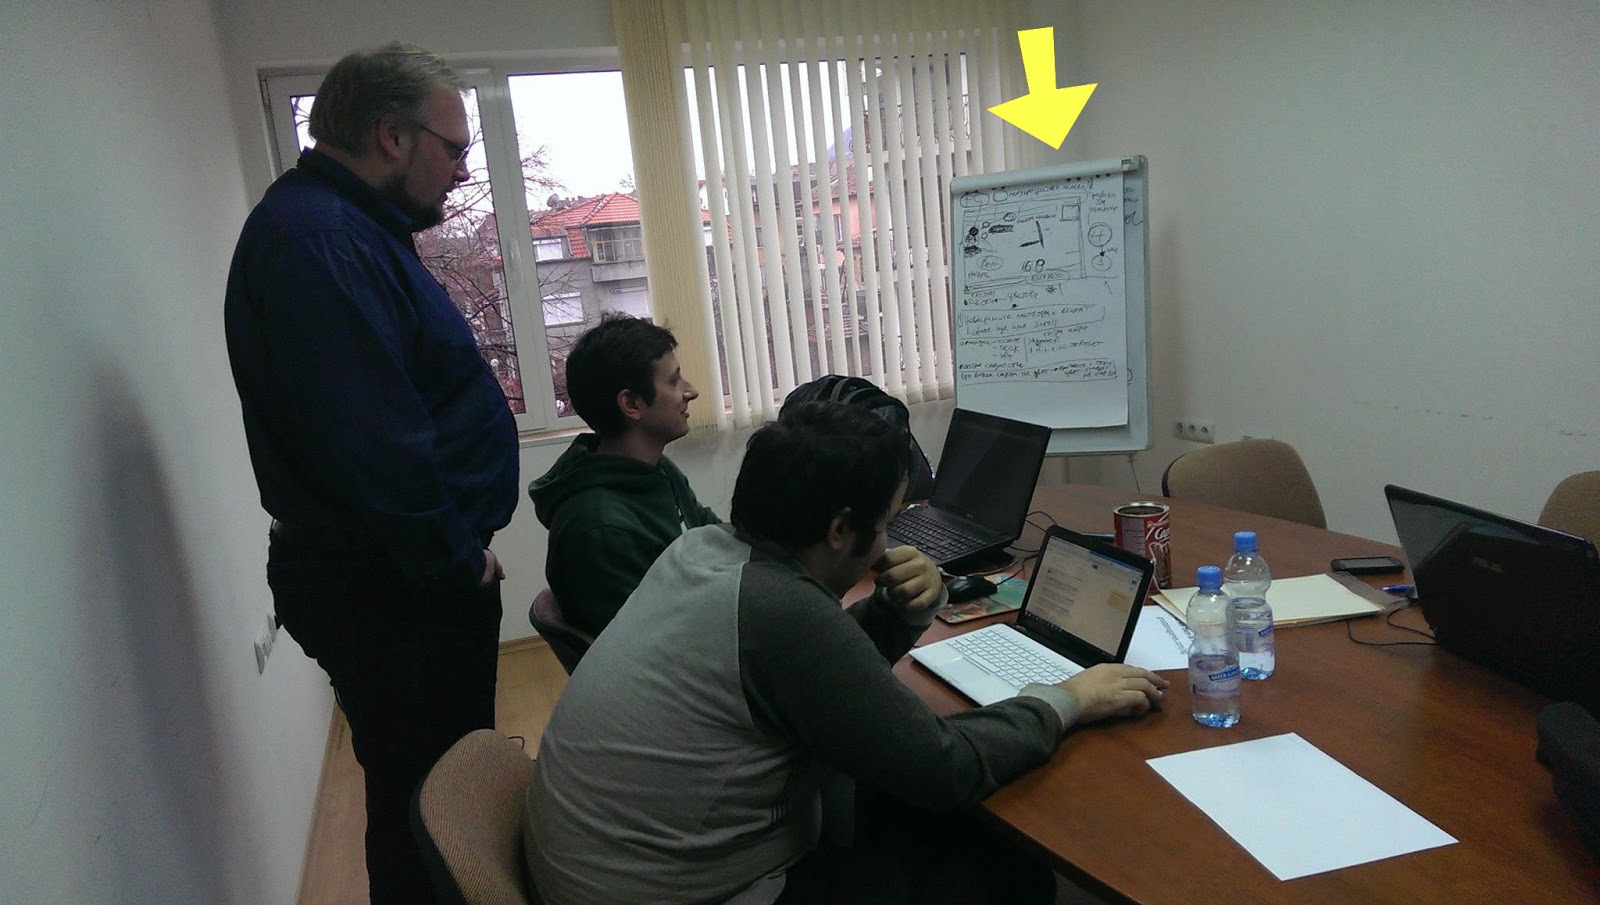
After the pitch was done, I got everyone on the team sit down together and flesh out the idea.  We were 4 people in the room -  having us all vote wouldn't have worked, so my involvement in this part was not to vote on ideas. Instead I sat outside the idea pool and acted as a mediator. I outlined our production plan on the white board -going through everything we need, see if everyone is on the same page and if not- let voting do the work. People brought up valid issues in the design and they voted on the best solutions - fleshing out the design. Would invincible platforms still act as platforms or not? Would invincible enemies continue to chase you while you don't see them? Is the outlined plan realistic for the 48 hours? What are our priorities- which features can be labeled as "extras"? What do the programmers need from me- the artist and from the rest of the team. What resolution would the game run in. How big is the sprite. And so on.

While one of the event organizers told me that we are wasting time with this planning, I still believe that one hour wasted on planning saved us from several hours wasted in arguing and headaches. I have been through this with other teams in the past and I knew what a recipe for little disasters looks like. It's when problems are brought up really late during production!
---------------------------------------
Workflow
First of all, game jam is an event in which a team has to make a game in 48 hours. Since I was the only graphics person in the entire team, I had to choose my battles wisely.


It started with an animation pencil test (done in pencil2d) - so i can give something to the programmers early on- for them to test with and also for me to get an idea about sprite size. This would later determine the line thickness of the final sprite and also the detail design.

Next on I looked for inspiration from "The forbidden Planet" and other b-movie posters from the silver screen era of awesomely cheesy 3d movies.
And thus drew the initial background- as tall as the game resolution and as wide as I my heart desired (then cropped it).   

Using Artrage- for it's natural media tools. Those helped me get closer to the poster vibe. Back in those days artists had no computers. I even faked some scratches on the paper and extra paper grain.

Having a BG tile lets me establish the overall color palette of the game - something that is a reference point when choosing colors for the player,platforms and enemy sprites - those need to stand out.

For the final sprite animations I used Toonboom studio. This allowed me to tweak colors and crispy line thickness. Finally- exporting to any size that my heart desires (or more like the programmers desire)- one of the greatest advantages of vectors.

Both the enemy and the player sprites are animated inside the same file- to save time and to have an easy way to compare them. The enemy design and coloring is inspired by a stylistic effect some pulp posters use - depicting it as a dark shadow with a detail defining neon rim light(s).
I managed to plan enough time for doing some 3 tone cell shading on the player sprite. The programmer required me to export both the player sprite and the enemy sprite in 4 different color mode versions. 


I know I could have done this as a cut out animation rather than inking all the frames. I chose to do it the proper way because setting up a cut out rig alone would have wasted that time anyway- the sprite animations are short so it wasn't worth it compromising their quality. If they were longer or the programmers needed it cut out for some procedural things- like armor swapping- then I would have had used "Spriter" instead of toonboom studio.

All this and much more was done in less than 48 hours!!!
Even managed to speedpaint a picture for the title screen during the last thirty minutes.

The title picture reuses the Planet graphic. There is the obvious mistake of having a different number of fingers. That index finger sure is crazy. But this is what generally happens after some sleep deprivation. :)

What didn't make the cut:
Our level designer kept insisting on having different backgrounds (suns) for each color mode. I resisted  because it complicates the core "hook" of perceiving colors and it is also creating more work for me.
He also insisted on having cut scene drawings to tell a comedic narrative. While this was welcome by me since his ideas on those are really entertaining- I decided not to do it because things with more priority were not finished. 
If we had more time I would have had the programmers change the font at the title screen, fixed the issues with my own half baked graphics, had insisted that platforms in the game are jump through type rather than solid, had insisted to place a different background for each level and a different music too (the musician made more than one tracks for the level) and many other things.
But this game is finished now and it's time to move on to better things. :)

Saturday, January 4, 2014

Starting at AnimSchool

In the end of last year I took all of my half baked university animation projects that I could use and gave them some polish. Here is the demo reel that was compiled out of them and submitted to Animschool:


todorImreorov- Animschool application video
4 or 5 hours after I submitted this, I was accepted in the 3d character animation program.

Now you may ask yourself- why did I apply at another animation school when in fact I just graduated from The University of Bradford - 3d computer animation bachelor degree- with a first class honors in 3d animation? I even got an award from the university- for excellence in education.

The reason is simple. The University of Bradford is an excellent place, where you get to learn many of the aspects of the entire pipeline of 3d animation and cinema/media theory. You can not however specialize in one thing- that being character animation - the thing at the end of the pipeline. 
The University gave me the materials to do so on my own (the library and the software), but not the time -
 in every single 3d animation class we had to model the character, build the rig, optionally texture, build the background,etc etc. Leaving a week or two for animating. 
Final year was also full of too many projects to tackle. That was partly my own fault too.

So I came out of university with a lot of half baked animation shots and the SODA TRIP project- half finished as well. I didn't get to learn and practice a lot of the theory that I still need in order to consider my animation showreel worthy of a good job application.

Some old progress on the Soda Trip project - cartoony character texturing.
Note that Soda Trip is still under development - as a hobby project!

Animschool is a prestigious online course, ran by Dreamworks, Disney, Blue sky, Pixar and other big studio animators. It's a school that doesn't let you graduate if your showreel is not at a level that makes you employable. They have strict quality control and reputation - with complete focus on animation. No rigging or modelling (for the "animate characters" course, they also have a separate "build characters" course too).

From now on I am going to be placing my focus on graduating from Animschool with a better animation showreel. You will start to see more animation work related posts in the future. I know that recently I have been posting a lot of general 3d and even game/software design related stuff.
Yes, the name of this blog is animation diary after all. :)

Here are some of the other prestigious online courses for 3d character animation:
Animation Mentor- The oldest of 3d animation courses. Founded by Pixar animators.
IAnimate- Highly competitive course with a lot of good rep. This was a close call for me. They have a great "game animation" class that focuses on animation for video games.

They are all excellent choices. I went with Animschool out of a hunch really. It's probably best to research them yourself and see the differences before picking one. Please don't ask me for opinion on which is the best. They are all really really good, but also expensive and not that easy to get into. Also I can't really compare them without being in all. This is a highly subjective matter.

And finally here is something I made while playing with Renoise DAW. It's a small music piece made for fun and to learn Renoise.

Friday, July 19, 2013

lessons learned from freelance jobs 2009-2013

I did a number of freelancer jobs in the last few years. That helped me immensely in learning to work with clients.

Animation for a documentary intro in 2011
Sometime in my second year of university I got in touch with Elaine who at the time lived in Japan. She asked me to do a 2d animation intro for a japanese documentary about football.
The project got to the rough animation outline stage, which she really liked.

It was going great. However at that time the power plant disaster hit Japan, so  the project was discontinued. I'm not sure that was the cause but it looks like it is related somehow. I did not get paid  yet. She is very nice  - recommending me to other people. Sometimes a project will get discontinued, not because the client is bad or you are bad. It's just life- nothing is certain. So get payment in advance- to guarantee you are not working for free.

Mr Jigglebuns 2013
I was to model, texture and rig a character based on a single reference image- for the front view. The character design is by a guy called Brian. We got this to the end of the modelling part + his requested revisions. He wasn't sure what he wanted for the character. He asked for revisions which were not included in his own concept art (like adding more fur, a bigger and more defined bum and in the end even adding pants)...It's a cat with a big butt that jiggles when dancing. Do you get that impression from the picture? :D


I made sure that the contract I requested for the project includes a clause for the extra features. In the end I didn't get a contract to sign and there was no NDA. I haven't heard from the client in almost half a year now so I  post the WIP screen shots declaring this project to be dead. A few hours worth of work wasted, but at least I have the model and some screenshots :)
This experience taught me about the importance of freelance job contracts. Really really tight contracts with detailed clauses. It's something that I should have started working on after having such a contract sorted. It also taught me the importance of getting to know a client. The more you know, the better for both of you.

The  Salmon Road
In 2009 I made a book cover illustration.

It was a proper paid job with a contract. I worked closely with the publisher to make sure the book looks good when printed.  The client in that case was a smart guy who knew exactly what he wanted and worked very closely with me to get it. He had a lot of input on it. Everything was A-ok, everyone was happy in the end. I got paid as expected.

I learned two things from the job. First of all Printing technology has a limited colour Gamut compared to rgb. It's important to get your colours in that gamut (CMYK mode) and show the client how it will look like when printed. Colours can completely change the mood of a piece. details may get lost in printing. You may have to do lots of colour correction and print tests.
The second thing was about creativity. My first version of the cover was in caligraphy style. It was originally intended to be on one of the pages of the book. The bird had no colour- it was stylized. But the client requested that I put it underwater, give it volume, give it colour. That is when I realized- It's not my vision- it's his. And I must follow it as closely as possible even if I have to loose something that was good in the first place. I may always have an ideal version of the work in my head, but the one that is to be submitted should and must fit with the vision of the client.


The Working Academy jobs
Since the start of 2013 I have been taking part time freelance jobs for
 the working academy at Bradford University.

They are a bit like an agency and have real company clients. I am currently doing some work for them.
There is no NDA in this perticular case, so I can share previous work.
The BBC and The Bradford Media Museum needed three mini games for the big screen in town - and to be used at festivals. The working academy hired me to create some animated sprites for the games. I had to make sure they are made in a way that is good for the programmers - in this case "Gaslight Games" - a local game's company. The highlight of that experience was spending a day at Gaslight Games to finish off the sprites and fix some stuff on other people's sprites.


Some lessons learned over the years


  • Do not start work on a project before both you and the client have a contract that you agree on- outlining in detail the work and the deadline(s).
  •  Make sure that you get an advance payment upon signing the contract - if you can. Some clients might get you to work on something for weeks or even months before the promised payment. And the payment might never come when the project is suddenly discontinued.
  • Break the project into green light stages - keep the client updated and get as much input as possible. Make sure you also break the payment into stages if possible.
  • It's a very common case with freelance clients that they make you do much more work than what you expected.  The more they are unsure of what they want, the more problematic it will be for you to deliver it on time. It's important that  they find that vision early. If they don't have any mock ups or concept art, request it or make it. If their project has unclear goals, make them clear things up. Ask all the questions you need in order to fill in  the gaps. If they want you to explore an idea with variations, that should be something you agreed to do in the start. If they ask for more (as a result of changing their mind) then they must pay extra for the extra work. Make sure that's covered in the contract.
  • Give them your input as well- early on. Let them know about any potential risks on the project. Explain possible ways to approach challenges. It depending on whom you're dealing with of course, so have that in mind as well.
It will be great to get some input from you folk of the web? Do you have any client stories you'd love to share? Any advice on working as a freelancer? I want to hear from you, learn from you. :)
So far the more freelancing I do, the more it makes me wish I had a normal job.


Sunday, June 2, 2013

Superfrog - animations


I did all the characters and their animations in the  froggy  game.

The main sprite:
The first stage of that process was outlining all of the actions he is going to do in a sort of a state machine mockup that I had to run through with Lutfi Couri, who is the main programmer on this project.  This  exact same thing was done for all of the other 2d and 3d objects in the game that contain animation clips.

The original superfrog sprite served as an inspiration, but I did take quite a few liberties with the character both in terms of design and animation.
During the pencil test, I would use layers in order to animate him one set of body parts at a time. The same approach is used in maya with the help of character sets. It's good to start with the root of the action- the torso/spine for example. Then animate on top of it the legs, then the arms, then the head, then the cape and so on. Layers are a good way of experimenting with animation for the different body parts.
Unfortunately pencil doesn't have the ability to duplicate layers, but is otherwise an excellent flipbook app.


The second stage was to go into toonboom studio, get the pencil tests in there , set the right resolution and form the animation library. Some of the body part animation is frame by frame, some is made by just squashing,stretching and rotating them. A well set up character rig in this case is key to easy pose-to-pose animation process. Sometimes when doing posing my character, I would go and pose the entire body frame to frame.

Third stage - after testing the sprite in the game, making sure it looks alright in perspective with the 3d background + camera angle, making sure the clips blend together alright and are at the right speed... I added some cell shading to it, some highlights, cleaned up the lineart and tweaked some things- then rerendered it.
Some of the animation clips (resized gifs) : run fast,run slow, die


Animation on 3d assets:

The enemies in the game were quite fun to do. Very similar in workflow- mockup state machine, do key poses then add secondary motion with some overlaps. It sounds like a lot, but it was very hastily done. I went straight to auto tangent and did very little work on tweaking the curves.
Find the extreme poses of what drives the secondary motion, then create the keyframes around those up and downs. Once they are at the right place, all one needs to do is push the secondary motion by scaling the keyframes on y in the graph editor.


Some more gifs here.

Sarah modelled and textured this mushroom. I changed the model's geometry a bit, then rigged and animated it.


Simple quick mushroom rig:
Made of 3 joints, no blend shapes. Set driven key+ aim constrains.

Problems(hopefully not too visible) When squashing the trunk loses some volume- that couldnt be helped as we cant use blendshapes or waste too many joints to go all around the trunk.
I added some squash and stretch to the head as well, but cant be bothered to update this gif.