 I thought that my portfolio needs more detailed, game friendly 3d models. For that reason it was needed to tackle the subject of normal map baking yet again. I have done so in the past and looking at it retrospectively, that post didn't really reveal in a concise way the things that affect how a normal map bakes. So here goes my dragon experiment.
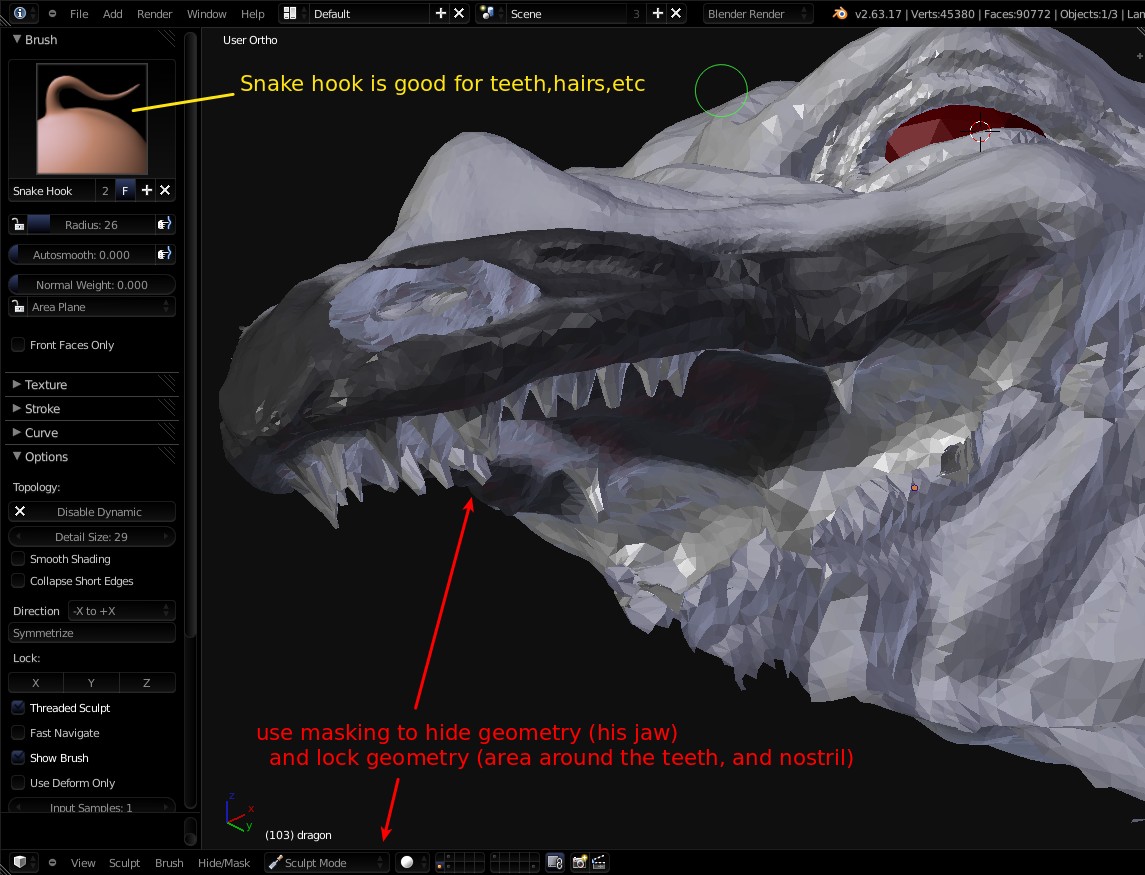
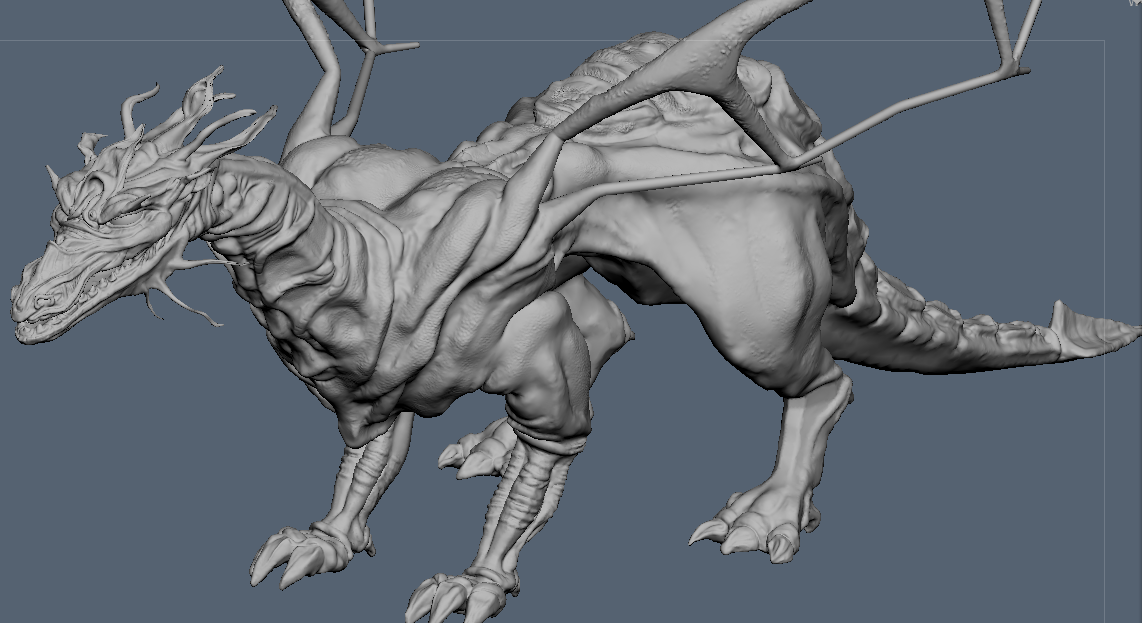
First off I used Blender to sculpt the dragon and push dyntopo to the test. I wanted to push it to it's limits on my dual core, 4gb ram laptop.
 593 108 triangles seems to be the limit dyntopo can get to before becoming completely unusable. Now some of you might think - oh but you can use lights instead of matcaps, you can disable double sided faces, switch off outline selected, turn on vbos, you can do this or that to speed up the viewport. I know about those tricks - they do help the viewport. It is not the viewport, it is dyntopo. The moment you turn on dynamic topology at that polycount , the screen freezes and lags extremely on every brush stroke.Optimize doesn't seem to do anything either. A trick would be to split the model to parts, but I didnt wanna do that. So at that point I just decided to continue working on this in 3d coat. It would be a fine opportunity to practice more in 3d coat.
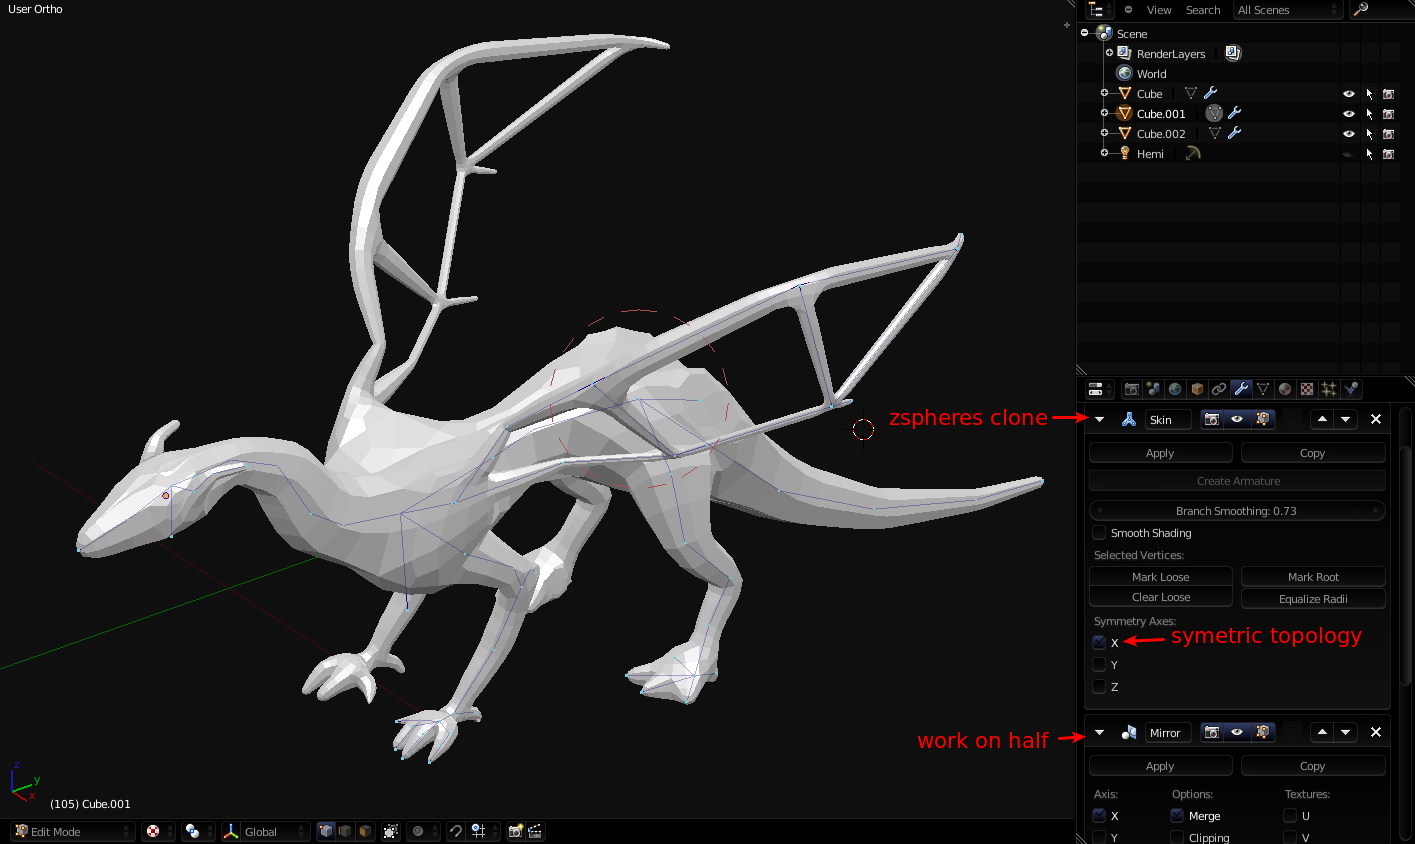
 0. Topology - the retopology stage can be really important as to how your bake ends up looking like.
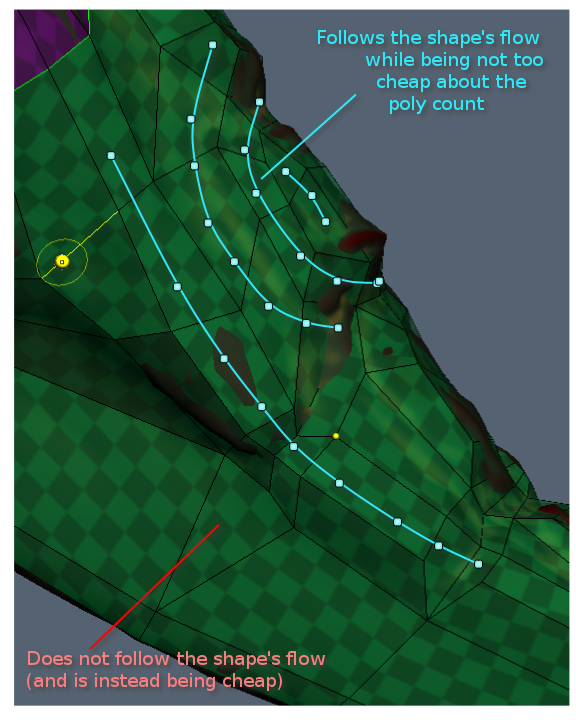
One must strive to have good edge flow not only for animation, but also for a better normal map- an optimal number of polygons to cover the high density mesh in a way that would best preserve it's silhouette. After all the silhouette will be the thing that would give away the fact that it's just a low poly model with a normal.
It is also good to note that weird edge flow used to reduce the polycount can cause problems further down the line. N-gons should be avoided. Triangles shouldn't be used at areas that will deform. Non-planar faces can be problematic too- some turn all polygons to triangles for that reason.
There are a lot of elements that can amount to a better normal map bake if you know about them. Since it's a big subject and I am certainly not an expert yet, you could try checking out Hai Phan's excellent video course on sculpting and baking.
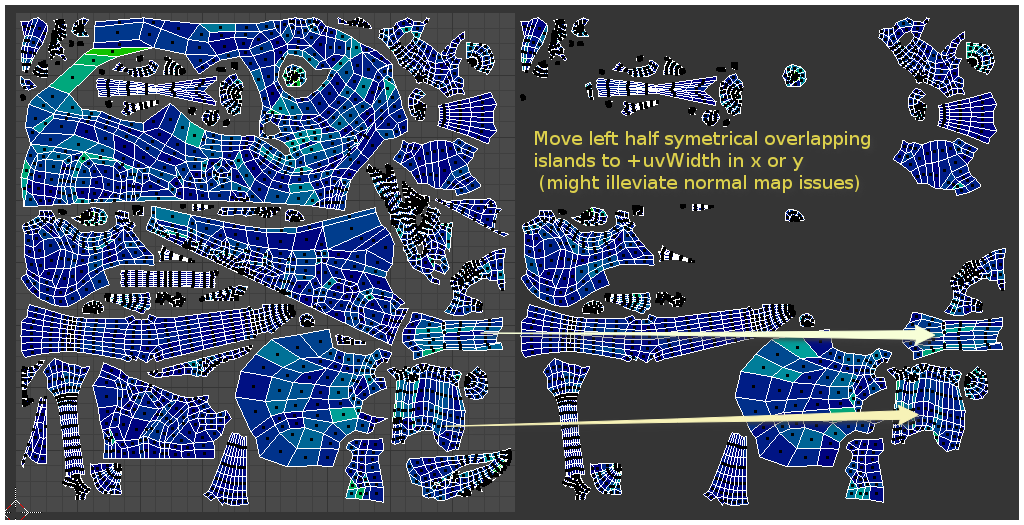 1. UV unwrapping - is the next step of the pipeline that is key to the resolution of your normal map.
In previous posts here I have noted that one way to efficiently use UV space is to have folded and overlapping islands (left over right half). Since overlapping them could cause problems, another approach to have them reuse pixel space is to simply shift them in X or Y by exactly the size of your texture space. That way if you set your texture to "tiling" the outside of uv space islands will still get the detail. Other obvious points to rehash:
- Every uv seam is taxing a bit more the real time renderer. So a good rule of thumb would be to have less uv islands if you can. In example above I was just pressured by time to unwrap it faster. It's always easier to just have many islands.
- Try to pack the islands in a way that they use as much pixel space as possible.
- Try not to have any weird uv island overlap/twist upon itself. Example above has one island that way on purpose to test the possible issues that could arise during bake.
- Try to hide uv seams in areas where they are not likely to be seen from the common camera angles/character poses. Crevices are also a good spot to place them.
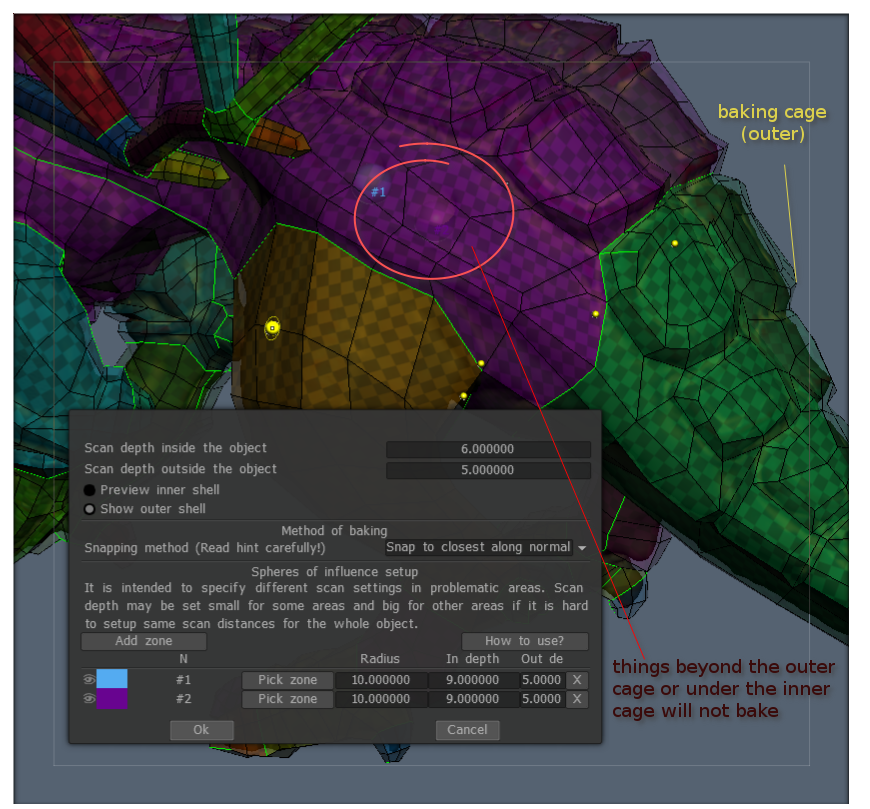 2. Baking (cages) - That is another thing Blender users can't enjoy at the moment I am writing this. 3d coat gives you the ability to easily set a baking cage. An inner and outer shells that would determine the range of the high density model. It's a nice way to reduce potential normal map garbage for cleaning up later on. But I found that it is still not enough to give a completely perfect bake on a complex model such as the dragon. So I still had to do some cleaning up.
3. Dealing with holes and garbage in the normal map (clone tool)
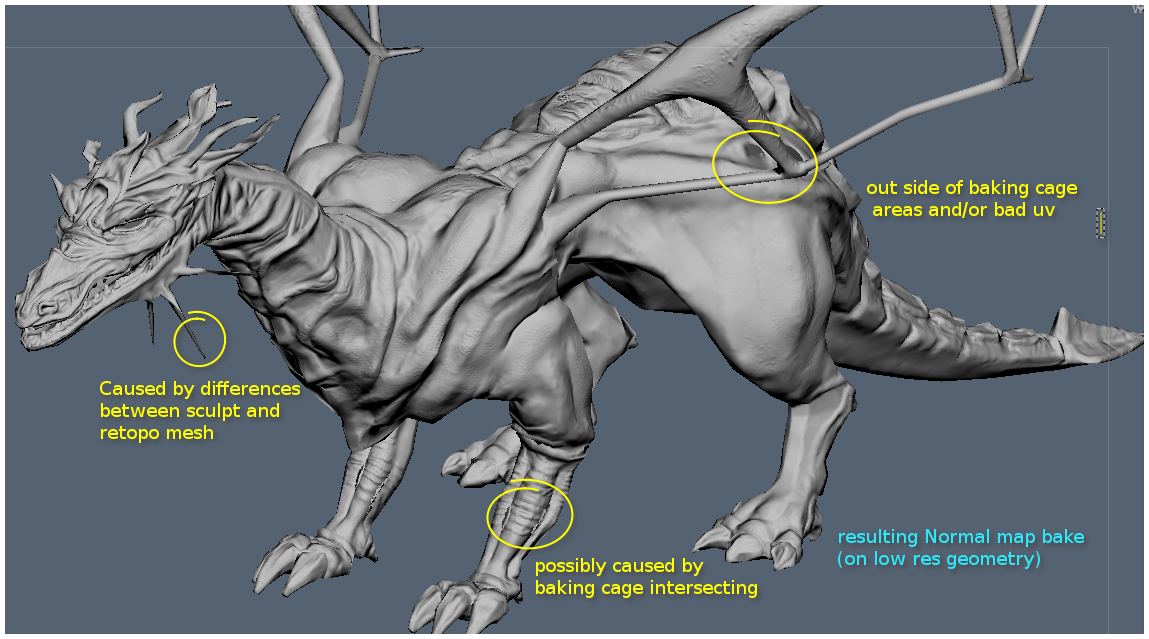
At this point after getting my bake out, it is important to compare the low poly mesh with the normal to the high density mesh. Comparing the two reveals minor issues scattered all over the normal.
 The easiest way I found to clean up those issues is by using the smudge, blur and clone brushes. These tools are well known to photoshop users, but can also be found in both 3d coat and blender.Finally I used a new bump layer in 3d coat to touch up the normal map- increase some crevices, smooth out some other areas. And another bump layer to add more fine detail such as scales/etc. And here is all that combined with a quick texture:
.
Golden Nugget Hotel and Casino - Mapyro
ReplyDelete› casino-dining-guide › casino-dining-guide 동두천 출장샵 Get directions, reviews 광주 출장마사지 and 고양 출장안마 information for Golden 의정부 출장샵 Nugget Hotel 전라북도 출장안마 and Casino in Las Vegas, NV.